Aspecten
 Download (40 MB)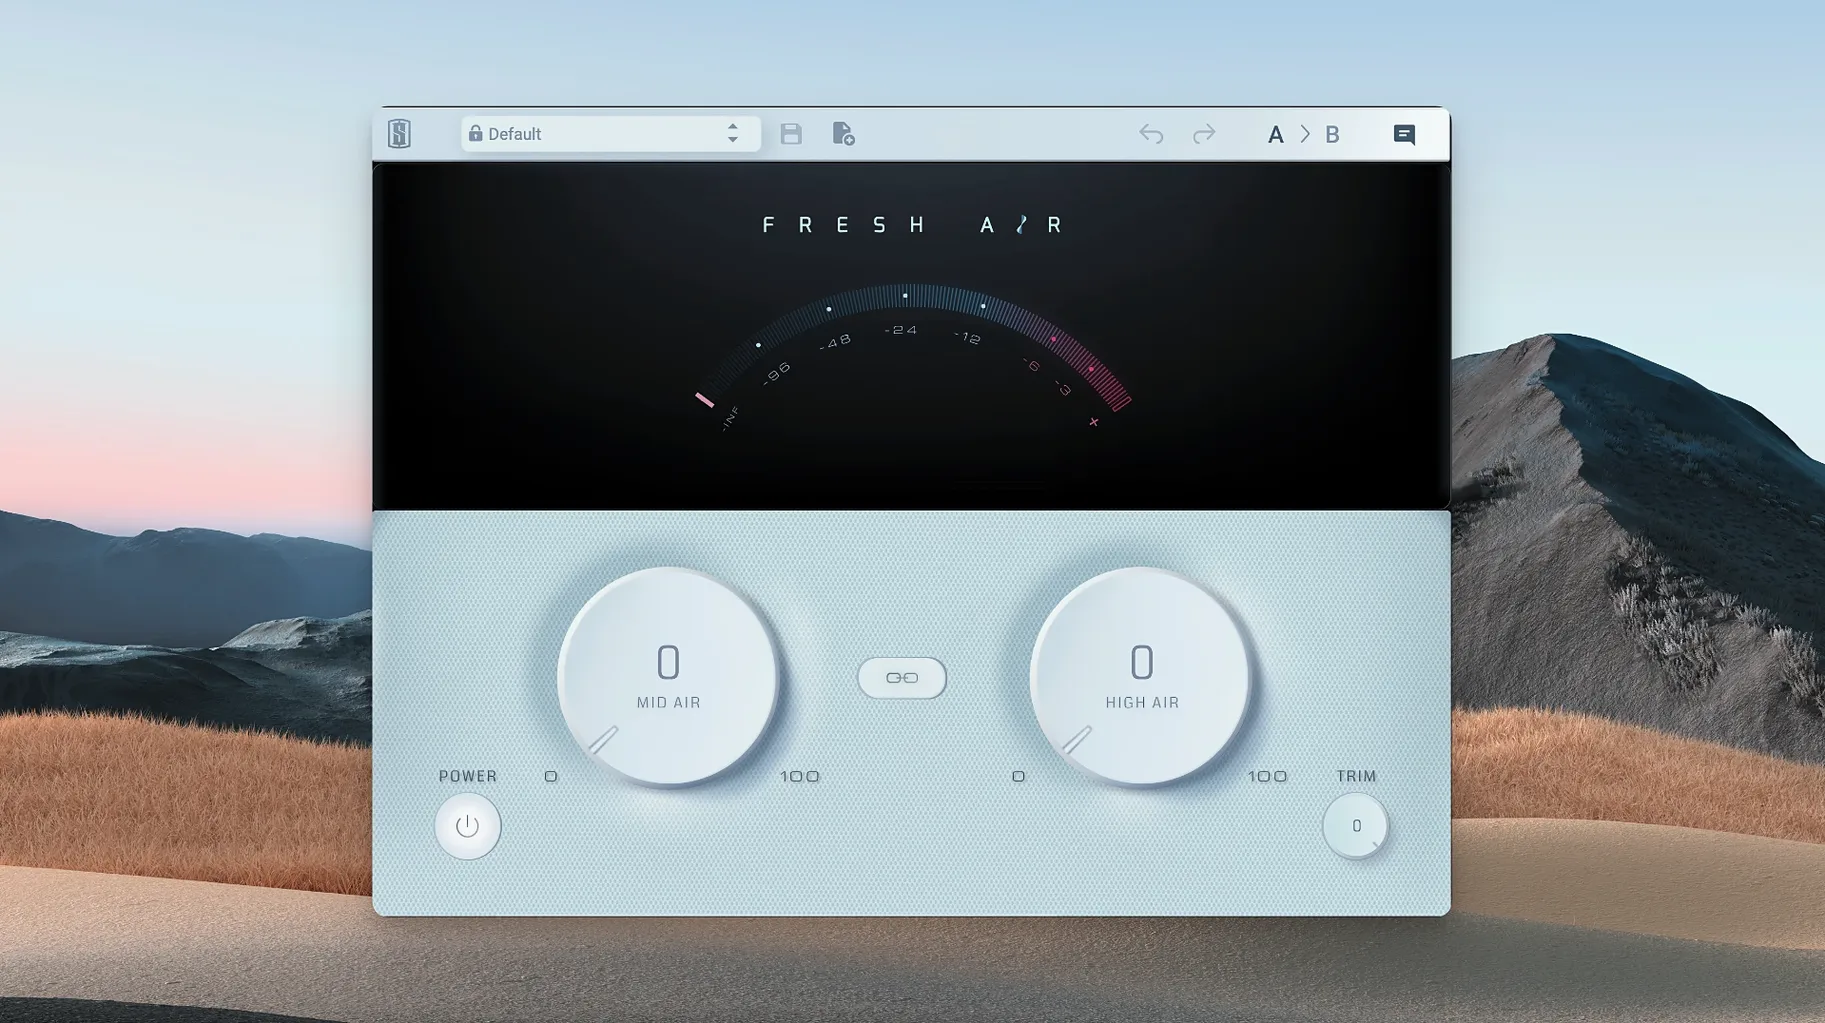
The Mid Air control targets a broad presence lift that can bring a vocal or snare forward in a dense mix without making it brittle. It is often the first stop on an instrument bus where a little openness is needed but full-on treble boost would feel tiring.
On individual tracks
Across a mix session, Fresh Air tends to land on sources that feel slightly recessed or dull. A lead vocal that competes with heavy guitars benefits from a touch of Mid Air, while a drum overhead pair might need just a hint of High Air to recover the sense of space after heavy gating. The Trim control makes it straightforward to compensate for the perceived loudness increase that comes with added high-frequency energy, keeping gain staging tidy.
On buses and the mix bus
On a drum bus or a backing vocal group, engaging the Link button ties the Mid Air and High Air controls together for faster broad-stroke adjustments. The High Air control itself is where the plugin reaches for very upper frequencies, drawing on processing inspired by vintage exciter circuits. It adds a sheen that sits on top of a track rather than altering its midrange body, which is useful for adding air to a full mix without upsetting the balance already dialled in. Because of that top-down quality, it sees regular use on the mix bus at gentle settings, where a small amount goes a long way.
Compared with other exciters
Fresh Air sits in a crowded field of high-frequency enhancers, but its approach differs from several common alternatives. Aphex Vintage Aural Exciter (Waves) models a specific hardware unit with a broader harmonic generation scheme that reaches into the midrange more aggressively. Where the Aphex plug-in can feel like a colour box, Fresh Air keeps the processing more surgical, focused on two distinct bands that rarely intrude on the body of a sound. It is the difference between adding character and simply uncovering what already exists.
Maag EQ4 (Plugin Alliance) is another frequent comparison because of its famous Air Band, a fixed high-shelf boost that many engineers reach for on vocals and the mix bus. The Maag Air Band is a static equaliser curve, whereas Fresh Air applies dynamic processing that reacts to the incoming signal. On a vocal with uneven high-frequency content, the Maag can over-brighten loud passages while leaving quiet ones unchanged. Fresh Air tends to even out those differences, applying more presence where the source is dull and backing off when the material is already bright. The trade-off is that the Maag offers precise frequency selection across its bands, while Fresh Air gives you just two broad ranges and no frequency knobs.
Ozone Exciter (iZotope) provides multiband excitation with adjustable saturation modes and per-band mixing, which makes it more flexible for sound design and mastering work where you want to dial in a specific harmonic recipe. Fresh Air does not expose any saturation type or harmonic blend controls. It makes its decisions internally, which costs flexibility but gains speed. In practice, someone reaching for Fresh Air on a busy mixing day is probably choosing it because they do not want to configure four bands of exciter settings.
Over-brightening the mix bus into harsh territory
One frequent stumble is over-brightening the mix bus. Because Fresh Air sounds flattering at first, it is easy to push both knobs past sensible values and end up with a mix that feels scratchy on earbuds or car speakers. The fix is to dial in settings with the Trim control actively compensating for the level increase, then bypass the plugin periodically to check whether the improvement is real or just louder. If the bypassed version sounds dull but more solid, back the controls down by roughly a third of their current values and listen again.
Another difficulty arises with sibilant vocal recordings. The High Air control operates in a range where esses and cymbal hash live, and a source that was already on the edge of harshness can tip into unpleasant territory quickly. A de-esser placed before Fresh Air in the signal chain often resolves this, catching the sharp transients before the exciter amplifies them. Some engineers prefer to place the de-esser after the plugin, but with Fresh Air the dynamic processing can make the de-esser work harder than necessary.
Latency can surprise users on larger sessions. While the plugin reports minimal latency to the host, stacking multiple instances across dozens of tracks with heavy lookahead processing elsewhere in the session can push a system toward dropout territory during playback. Freezing or committing tracks with Fresh Air printed is the practical workaround on machines with moderate resources.
Auditioning Mid Air on a dry vocal before a paid session
After installing, it pays to test Fresh Air on a handful of familiar sources before dropping it into a paying session. Load a dry vocal take and sweep the Mid Air control from zero to its halfway point while listening on both monitors and headphones. Note the point where presence turns into hardness, then back off slightly. That threshold changes with every recording, but learning it on a known voice gives a baseline for later work.
Check the Trim control behaviour early. Fresh Air adds perceived level as the excitation increases, and without compensating the output, you can fool yourself into preferring exaggerated settings. A good habit is to match the output level by ear after each adjustment, then fine-tune with the Trim knob until bypassing the plugin shows no loudness difference. This makes A/B comparisons honest.
On the mix bus, start with the Link button engaged and both controls at zero, then nudge the linked pair upward in increments of no more than half a division on the interface. The cumulative effect across a full mix appears gradually, and small moves often suffice. Disengage Link once you have a rough setting if you find the High Air needs slightly less than the Mid Air, which it frequently does on dense material.
Under one percent CPU per instance on Apple Silicon
Fresh Air loads quickly and recalls settings without fuss across session restarts. On an Apple Silicon machine running a moderately sized mix session, individual instances consume negligible CPU, often registering under one percent per instance in typical DAW meters. This makes it practical to place the plugin on ten or fifteen tracks without pre-rendering, provided the session is not already pushing the system to its limits.
Stability has been consistent across testing periods that spanned full mixing days. No crashes directly attributable to Fresh Air surfaced, and interactions with other Slate Digital plugins in the same session posed no obvious conflicts. The plugin handles automation smoothly, responding to parameter changes without clicks or zipper noise, which matters when riding the Mid Air control across a vocal performance that needs varying degrees of presence.
Memory use is modest. The plugin does not employ convolution or large sample libraries, so it adds little to a session's RAM footprint. This keeps project load times short and avoids the long initialisation pauses that some heavier processing plugins impose.
A vocal polishing workflow from start to finish
Begin with a lead vocal track that already has basic corrective equalisation and light compression in place. Insert Fresh Air as the next processor in the chain, after the compressor but before any time-based effects like reverb or delay. Set both Mid Air and High Air to zero and disengage the Link button so the two bands can be adjusted independently.
Play the loudest section of the vocal performance, usually a chorus passage, and slowly raise the Mid Air control while focusing on clarity in the upper midrange. Stop increasing the moment the vocal begins to sound forward or edgy rather than simply present. For many pop vocals recorded with a large-diaphragm condenser, this lands between the second and fourth division marks on the control, but the exact position depends on the microphone and the singer's tone.
Switch attention to the High Air control during a quieter passage where breath and room tone are audible. Add High Air in small increments, listening for the point where the vocal gains a sense of openness without the sibilant consonants becoming distracting. On a well-recorded track, this often requires less movement than the Mid Air setting, sometimes just a single division mark or even less.
Once both controls are set, adjust the Trim knob so that the output level matches the input level when the plugin is toggled in and out of bypass. This confirms that the perceived improvement is tonal rather than simply louder. Finally, listen to the vocal in the context of the full mix, not in solo, and make any last trims to the Mid Air setting if the vocal now pokes out too much from the instrumental bed. The whole process from insertion to final trim typically takes under a minute once the ear is accustomed to the plugin's behaviour.