Aspecten
 Download (67 MB)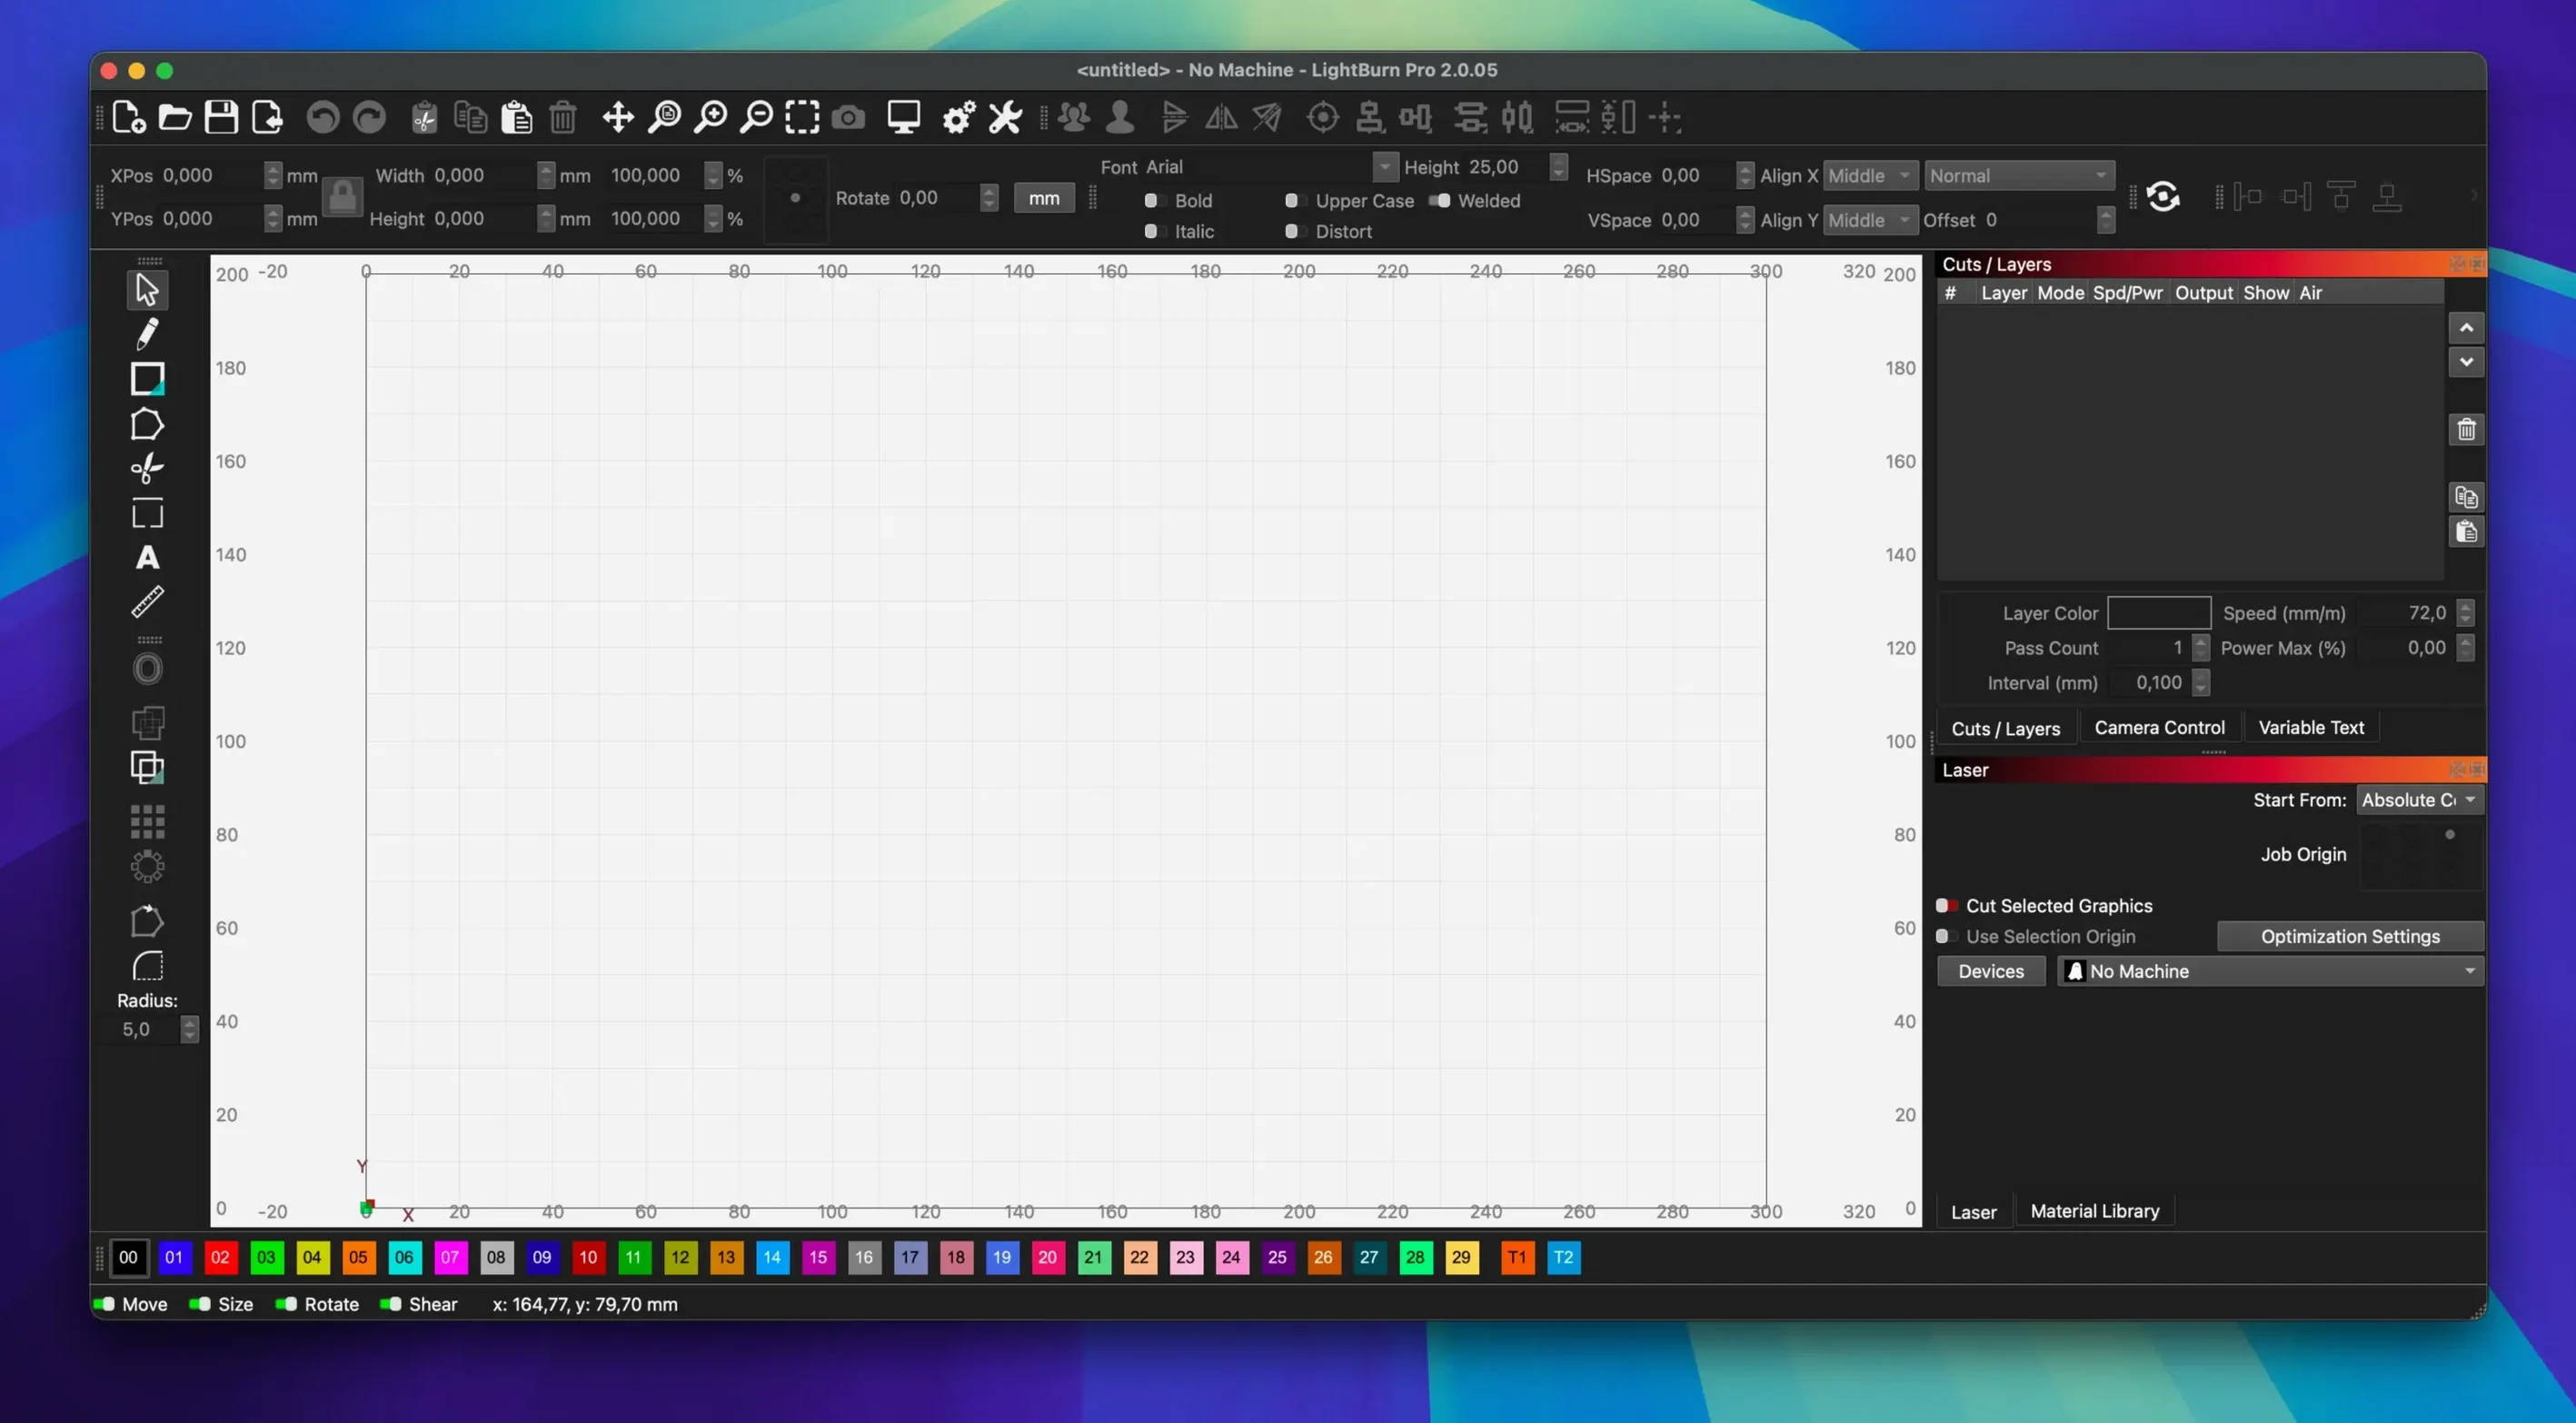
LightBurn is layout, editing and control software for laser cutters, serving both hobbyists and professionals on the Mac. The 2.0 release refines the workspace with a clearer interface and several new editing aids, without losing sight of the practical job of sending clean work to a machine.
- Built-in vector editing. Shapes, text and node-level paths can be created and adjusted directly on the canvas. The new Edit Nodes toolbar makes path tweaking faster, reducing trips to outside design software.
- Material presets. A library of pre-configured speed and power settings removes guesswork from cutting and engraving. Switching from birch ply to acrylic is a matter of picking a profile, not running new test grids.
- Image preparation. Raster imports benefit from vectorisation, masking and edge enhancement tools. Photographs and scanned artwork can be tuned inside the same window that drives the cutter, keeping the preview honest.
- Rotary and camera support. A rotary axis stays in sync with the design workspace, and camera calibration helps align work on irregular stock. The improved calibration option in 2.0 makes the setup quicker to repeat.
- Broad file handling. The software reads common vector and raster formats — AI, SVG, DXF, PDF, PNG, JPG — so files arrive largely intact from other applications.
Under the hood, version 2.0 settles several small but persistent issues, including a crash with certain SVG files and unexpected jogging direction on rotary setups. The addition of Dark Mode is a quiet quality-of-life change that suits longer sessions at the screen.
Check the auto-save and selection tolerance defaults
A handful of preferences make an immediate difference to how comfortably the software fits into daily work. None are buried, but a few are easy to overlook during the first launch.
Open Edit > Settings and move to the General tab. Switch on Auto-save backups and set an interval that suits your pace — five minutes is a safe default for most. The backups land in a separate folder and do not overwrite the main file, so a crash or an ill-judged edit rarely costs more than a few minutes of work.
Still in General, check Default unit of measurement. Millimetres make sense for laser work unless your machine and stock are consistently set up in inches. A mismatch here leads to quiet scaling errors that are not always obvious in the preview. If you work with both, the per-project setting overrides the default, but a sensible starting point avoids early confusion.
In the Display tab, consider lowering the Grid density to a cleaner setting. The default grid can look busy on a 13-inch screen. A spacing of 10 mm with one subdivision is usually enough for layout while keeping the canvas readable. The grid colour is also adjustable here; a soft grey blends better with both light and dark backgrounds than the default blue.
The File Settings tab holds a small but practical option: Remember last used import folder. When enabled, the open dialog returns to the last folder you pulled a file from, which saves repeated navigation when you batch-process designs from the same client or project directory.
From client artwork to a routed sign with a photo
This walk-through covers a realistic job — a small wooden sign with routed text and a raster-engraved photograph — to show how the pieces connect without glossing over the practical steps.
The design begins outside LightBurn. A client sends an SVG of a shaped blank with two text blocks and a placeholder rectangle for the photo, plus a separate JPG portrait that needs to sit inside that rectangle. Both files land on the desktop.
Drag the SVG onto the LightBurn canvas. The vector outline and text appear as editable shapes. Select the placeholder rectangle and note its dimensions from the toolbar — 80 mm by 60 mm in this case. Delete the rectangle; it was only a guide. The shaped blank outline is left in place for positioning, and the text is set in a clean sans-serif that the laser will trace as a vector path.
Next, import the JPG through File > Import. LightBurn places it as a raster object. With the image selected, set its width to 80 mm in the toolbar and lock the aspect ratio. Position it where the rectangle sat. The preview now shows the photograph floating above the blank outline. Right-click the image and choose Adjust Image. A small dialogue opens with brightness, contrast and dithering controls. For birch ply, a slight contrast boost and Jarvis dithering produce a readable engraving without burning too deep. The live preview updates as you drag the sliders.
Switch to the Laser tab to assign settings per layer. The blank outline gets a cut layer in red: speed 20 mm/s, max power 65%, one pass. The text gets a slower engrave layer in black: speed 100 mm/s, power 30%, one pass. The photograph gets a third layer, also black but with a tighter line interval of 0.08 mm for finer detail. The material preset for 3 mm birch ply supplies sensible baseline numbers, but the photo layer is tweaked to avoid charring the lighter areas.
Before sending the job, open the Preview window. The simulation cycles through the layers in order, showing the planned path and estimated duration. The cut outline runs first, then the text, then the photo — a logical order that prevents the cut from displacing the workpiece before the engraving finishes. Drag the photo layer below the cut layer in the Cuts/Layers panel so the cut runs last instead. A small adjustment, but it keeps the stock flat and stable for the fine raster pass.
Frame the job with the laser's positioning controls, check that the rotary is disengaged, and press Start. The whole process from import to running the job takes under fifteen minutes once the material settings are dialled in.
Dark Mode and the 1.x to 2.0 changes you notice daily
Version 2.0.05 is a maintenance release, but the step from the 1.x line to 2.0 brought several changes that affect everyday work. The facts from the developer point to a handful worth knowing.
Dark Mode arrived with the 2.0 series. On macOS, the interface follows the system setting or can be toggled independently. For anyone who runs a laser in a dimmed workshop, the darker canvas and tool panels reduce glare noticeably. The switch does not alter the preview or the laser output — it is purely a comfort feature, and a welcome one during long calibration sessions.
The Edit Nodes toolbar, also new in 2.0, moves common path-editing actions out of the right-click menu and onto a dedicated set of buttons. Adding a node, breaking a segment or smoothing a curve is now a single click instead of a menu dive. For users who tweak imported vectors — cleaning up traced artwork or adjusting kerf offsets — the toolbar cuts the number of cursor trips per session.
The improved Camera Calibration option simplifies a task that used to require several trial captures. Aligning the camera overlay to the work bed is still a careful process, but the revised calibration routine asks for fewer reference points and recalculates faster when you nudge the position.
Version 2.0.05 itself deals with three fixes: a window title bar that could appear off-screen when stored offsets were wrong, a rotary jogging direction error in CCW mode, and a crash triggered by SVG files containing ungrouped DEF shapes. The crash fix alone matters for anyone who imports SVG artwork from older or less tidy sources — the kind of files that arrive from clients who drew in a free online editor and exported without checking the structure. Where earlier releases might quit unexpectedly, 2.0.05 loads the file and flags the ungrouped elements without fuss.
Run a 20 mm test grid before your first real job
Running a laser safely and efficiently depends as much on habits as on software. A few practices adopted early prevent wasted material and frustration.
Before designing anything, run a small test grid on your most-used material — a 20 mm square with power and speed stepped in rows and columns. Save the result as a custom material preset. The built-in library is a good starting point, but every laser tube and lens has its own character, and the preset for 3 mm ply on one machine may char or undercut on another. Naming the custom preset clearly — “3mm birch – 50W CO2” — makes it easy to recall later.
Set up the Laser tab to show only the layers you need. A fresh project starts with a long list of default colours, but most jobs call for three or four at most. Right-click any unused colour and choose Remove. A tidy layer panel is quicker to read and reduces the chance of sending an accidental burn layer to the machine.
Get comfortable with the Selection toolbar modifiers early. Holding Shift while dragging constrains movement to horizontal or vertical, and holding Alt duplicates the selected object on release. These two shortcuts alone save dozens of trips to the Edit menu during a layout session.
On Apple Silicon Macs, LightBurn runs under Rosetta 2. The translation layer adds a small overhead, but the software remains responsive for typical jobs. If your machine has 8 GB of RAM, keep an eye on memory pressure when working with large raster files — a 600 dpi scan at A4 size can push the system, and closing other heavy applications helps prevent the occasional stutter during preview generation.
Rosetta 2 translation on Apple Silicon feels immediate
LightBurn 2.0.05 runs as a 64-bit Intel binary on macOS, which means Apple Silicon machines use Rosetta 2 translation. In practice, the translation is well-handled: the interface draws without lag, vector editing feels immediate, and the laser communication thread stays responsive even during longer jobs.
Startup time on a 2020 Intel MacBook Pro is under four seconds. On an M1 Mac mini the same launch takes slightly longer — around five to six seconds — as Rosetta loads the Intel code on first launch. Subsequent cold starts settle at a similar pace. Once open, idle memory use sits around 180 MB, which rises to roughly 400 MB when editing a moderately complex project with two vector layers and a raster image at 300 dpi. These are modest figures for a design tool, and the software does not leak memory noticeably over a working day.
Stability in 2.0.05 is markedly improved over early 2.0 releases. The SVG crash fix removes a pain point that affected users pulling artwork from varied sources. During a week of regular use — cutting, engraving, switching between material presets, and running rotary jobs — the application did not quit unexpectedly. The main risk factor is a poor USB connection to the laser controller rather than a software fault; a brief disconnection can leave the job paused, but LightBurn recovers gracefully when the link is restored, resuming from the current position if the controller supports it.
Job transfer speed depends on the controller. With a DSP controller over USB, a vector-heavy design transfers in a second or two. Raster files with high line counts take longer; a 200 mm × 150 mm engraving at 0.08 mm line interval generates tens of thousands of movement commands, and the transfer to a GRBL controller may take ten to fifteen seconds. The software shows a progress bar during this handshake, so the wait is visible and expected. The laser itself becomes the bottleneck, not the software.
For users who work on older Macs still running macOS 10.13 through 10.15, the system requirement is well-judged. LightBurn 2.0.05 does not demand the latest Metal-capable graphics stack, and it runs on a 2012 MacBook Pro with integrated graphics without dropping frames during canvas