Aspecten
 Download (2.3 GB)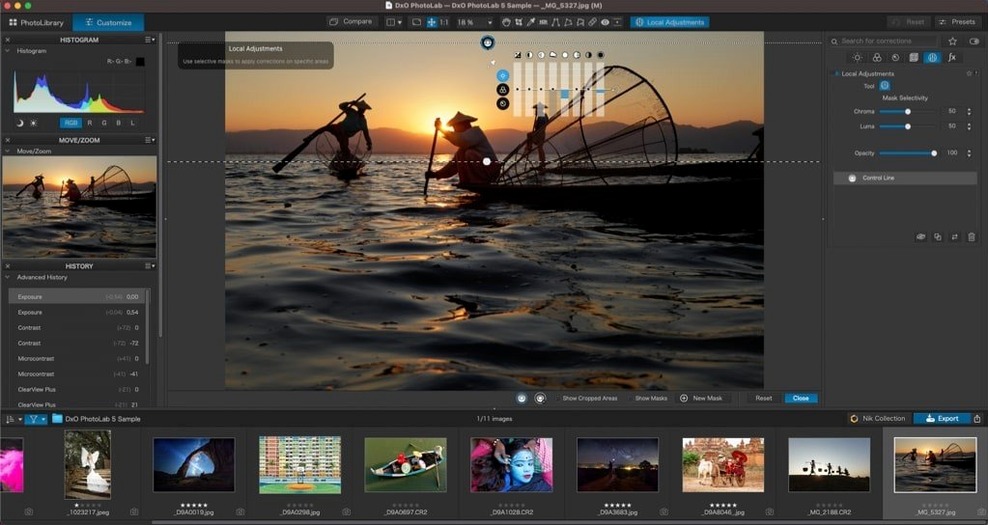
A RAW file straight from the sensor looks flat and unfinished. Colours are muted, noise sits in the shadows, and lens distortions go uncorrected. DxO PhotoLab approaches this starting point by combining automatic optical corrections with manual refinement tools, letting a photographer build a clean, printable image without fighting the data.
A three-pane layout with corrections stacked in one column
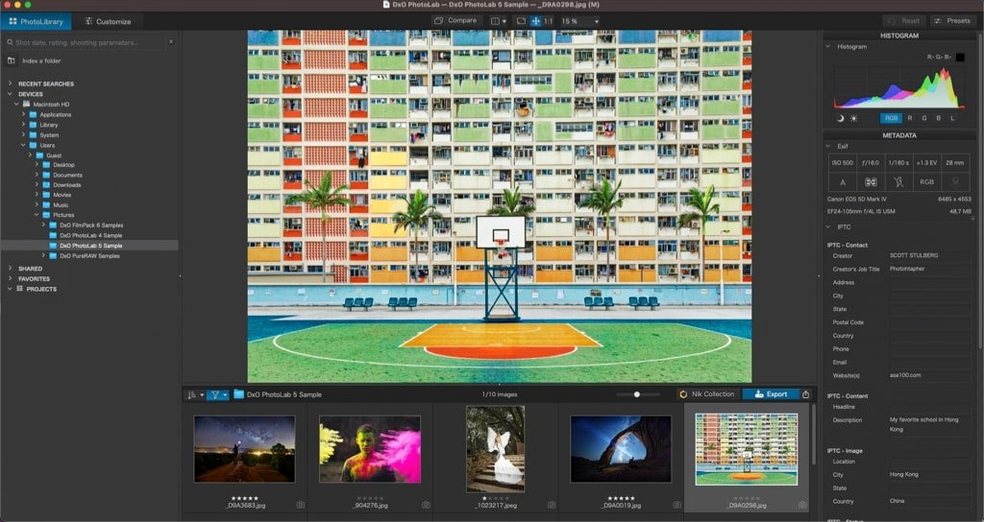
The layout divides into a browsing panel for the image library, a central viewer, and a correction palette on the right. Essential adjustments sit in a logical column: exposure, Smart Lighting, noise reduction, and lens sharpness. A small set of Subject Types in the quick-select bar lets you synchronise edits across images with similar content — skies, foliage, skin tones — without writing complex masks. The interface keeps most controls within a single click, though the sheer number of sliders means it takes a few sessions to learn what each panel actually does.
Opening a high-ISO portrait triggers automatic lens correction
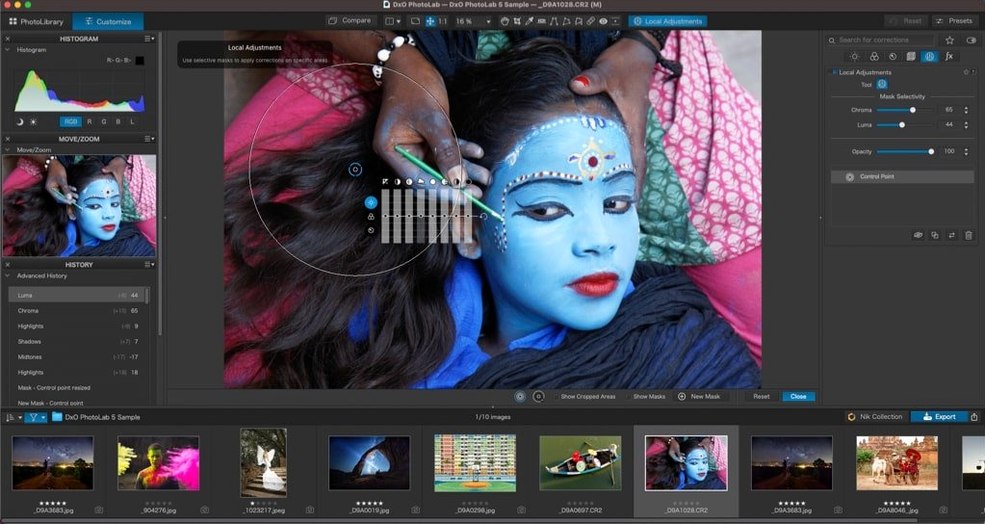
A typical task starts with opening a high-ISO portrait from a supported camera. The optical module reads the lens profile and corrects distortion and vignetting immediately. DeepPRIME XD3 then tackles the colour noise in the background while preserving hair detail — demosaicing and noise reduction happen in one pass, which keeps textures intact. DxO Smart Lighting lifts the shadow side of the face without washing out the midtones. Local adjustments follow: a U Point control point on the iris sharpens and brightens it, and that same adjustment can be copied to a second portrait taken seconds later under the same light. The sequence feels linear rather than experimental, which suits a photographer who wants a predictable path from import to output.
Correcting a backlit portrait, start to finish
Begin in the PhotoLibrary tab and select a RAW file shot against a bright window. The preview loads with the subject in heavy shadow and a washed-out background. Click the Customize tab to enter the editing panels. The optical module activates automatically — barrel distortion from the wide-angle lens disappears and the corners brighten as vignetting correction applies the lens profile. Switch the noise reduction engine to DeepPRIME XD3 in the detail panel. At ISO 6400, the algorithm pulls colour noise out of the subject's jacket while keeping the fabric weave distinct, which a luminance-only denoiser would smudge.
Now tackle the exposure. Drag the Smart Lighting slider to around 40 — it brightens the face and shirt without touching the window light. The background remains usable rather than blown. Open ClearView and increase it to 25, which cuts through the haze spilling in from the window and restores contrast along the subject's outline. The image already looks workable, but the eyes need local sharpening. Select the U Point tool, place a control point on the nearest eye, and reduce its radius so it covers the iris and lashes only. Push microcontrast to 18 and sharpness to 30. Copy that control point, place it on the other eye, and the settings apply identically. Add a second, larger point on the cheek to lift the shadows there by a third of a stop. Export as a 16-bit TIFF for further retouching or a full-resolution JPEG for delivery. The whole edit takes under four minutes once the steps become familiar.
Skipping the optical module leads to needless manual cropping
The most common mistake is ignoring the optical module. A photographer opens a file, sees distortion, and starts cropping manually, unaware that switching to a supported lens profile fixes the geometry and edge softness in one click. The panel sits at the top of the corrections list for a reason, but beginners often scroll past it.
Another frequent error is cranking DeepPRIME XD3 to its maximum luminance setting on a clean ISO 200 image. The algorithm is aggressive enough to smooth legitimate texture, and at low ISOs the standard DeepPRIME or even the default noise reduction usually suffices. Reserve XD3 for ISO 3200 and above, or for underexposed frames pushed several stops in post.
Overuse of control points creates a different problem. Dropping fifteen U Points across a portrait might seem precise, but the overlapping influence areas interact in unpredictable ways. Three or four well-placed points almost always produce a cleaner result. Beginners also tend to treat Smart Lighting as an exposure slider rather than a tonal balancer — pushing it past 70 flattens the image and introduces an artificial HDR look that is difficult to undo later in the pipeline.
Finally, new users sometimes export before the processing queue finishes. DeepPRIME XD3 can take several seconds per image on older Apple Silicon machines, and the preview updates progressively. A premature export embeds the partially rendered preview rather than the final processed data, leading to soft output that looks nothing like the editing view.
A food photographer's session
A food photographer opens a folder of thirty RAW shots from a morning shoot — overhead flat lays of plated dishes lit by window light. The camera is a Fujifilm X-Trans model, supported by DxO's optical modules. After importing, she selects the first image and immediately activates the Fujifilm X-Trans lens profile. The module corrects a slight pincushion distortion that was bending the plate rim and removes a magenta colour cast near the frame edges that the lens produced at close focus distances. DeepPRIME XD3, tuned to handle X-Trans sensor noise, cleans the subtle grain from the shadow side of a dark ceramic bowl without affecting the texture of breadcrumbs scattered across the surface.
She applies a Subject Type to the image — choosing "Food" from the quick-select bar — and then synchronises the optical corrections, noise reduction, and a modest Smart Lighting boost to all thirty frames in one operation. The synchronisation skips local adjustments because she wants to fine-tune those per image. She reviews each shot, adding a U Point on a glossy sauce highlight to pull back a clipped red channel, then copying that adjustment to three other frames with similar plating. The consistency across the set means the restaurant's social media gallery looks cohesive without hours of manual matching. By lunch, she has a contact sheet of clean, printable images and only needs to export.
Browsing directly from the memory card before a dawn edit
The photographer opens DxO PhotoLab on a MacBook Pro. The library panel shows a memory card's contents, still on the card, browsed directly without importing. Double-clicking a landscape shot opens it in the viewer. The image is a dawn scene: snow-covered peaks, a dark foreground lake, ISO 800 with visible chroma noise in the water. The DxO Standard preset loads automatically, applying modest sharpening and the camera's default colour rendering. She switches to the DxO Natural preset to soften the contrast curve, which suits the low morning light better.
The lens correction panel confirms that the wide-angle zoom profile is loaded. Distortion and chromatic aberration corrections engage immediately — purple fringing along the ridgeline vanishes. She opens the noise reduction panel, selects DeepPRIME XD3, and watches the preview update. The water surface loses its speckled colour noise while retaining the fine ripples. The luminance slider stays at 40; pushing higher would smooth the rock texture on the shoreline.
Smart Lighting lifts the foreground at 35, balancing the dark lake against the bright snow. ClearView at 30 adds definition to the distant peaks by cutting through the thin haze layer. Satisfied with the global adjustments, she zooms to 100% and places a U Point on a prominent rock in the foreground, boosting microcontrast to give it a tactile sharpness without affecting the softer water around it. A second control point on the sky darkens the blue just enough to make the snow pop.
She copies the local adjustments from the edit menu, moves to the next landscape in the series, and pastes them. The control points land in roughly the same positions because the compositions are similar. She tweaks one point's position on the second image — the rock sits slightly higher in the frame — and the edit is done. The session moves through twelve landscapes in twenty minutes. Export settings are already configured: 16-bit TIFF, Adobe RGB, full resolution. She queues the batch and lets the processing run while she organises the next shoot's files. The progress bar ticks through each image as DeepPRIME XD3 renders the final noise reduction pass, which always takes longer than the preview suggests but produces noticeably cleaner files than the in-camera JPEGs she used to rely on.