Aspecten
 Download (356 MB)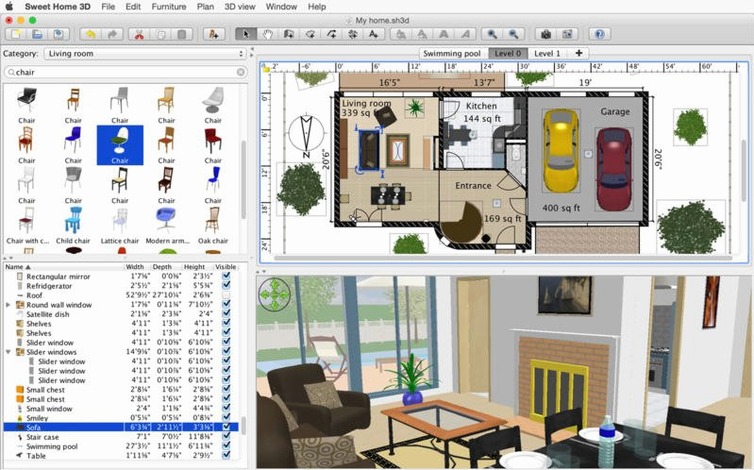
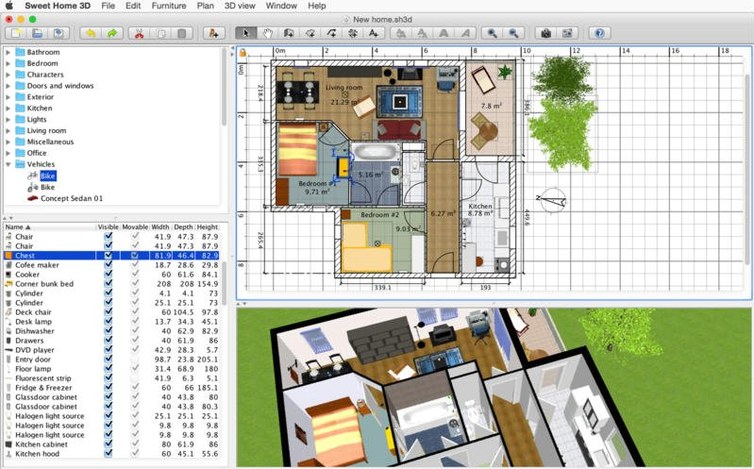
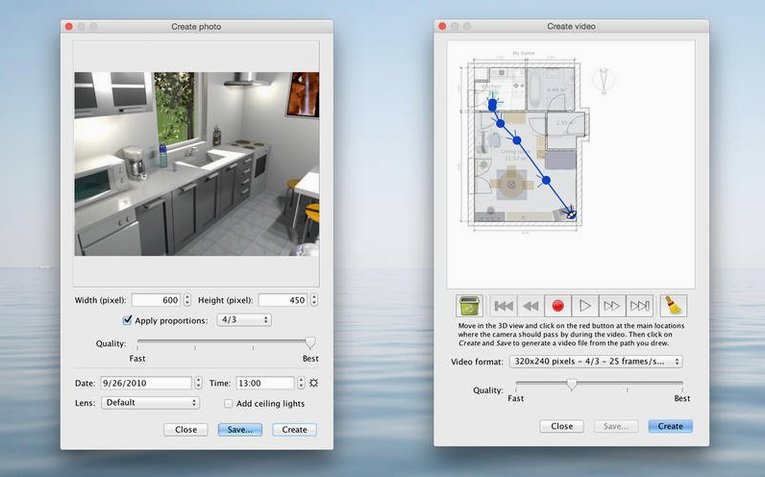
Designing a room layout often means wrestling with graph paper or expensive CAD suites that assume you already know the jargon. Sweet Home 3D strips that back to something more direct: draw your walls, place your furniture, and walk through the result. If you have just installed it, a few early experiments make the whole tool click faster.
- Draw one room with real dimensions. Instead of dragging walls freely, type the exact length as you draw. The plan stays true to the space you actually have, and the 3D view updates as you go.
- Switch between aerial and visitor viewpoints. The aerial view helps with layout; the visitor view puts you at eye level inside the space. Toggling between them reveals proportion issues that a top-down plan hides.
- Add light sources and set the sun position. Go beyond the default flat lighting. Placing a lamp and adjusting the time of day in the 3D view shows how natural and artificial light fall across surfaces.
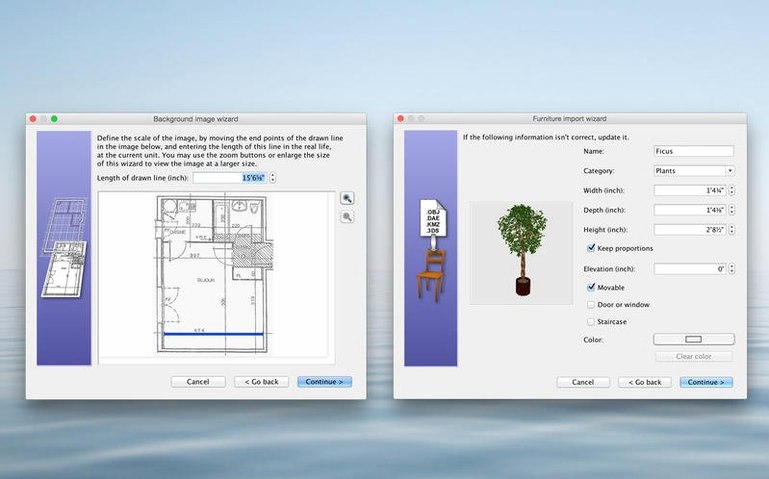
- Import a single 3D model of your own. The built-in catalog holds over 1,400 objects, but importing a model of a real piece of furniture you own makes the scene feel recognisable and tests the app's handling of external OBJ or DAE files.
- Create a short video walkthrough. Set a few waypoints and let the app render a path through the room. It is the quickest way to spot awkward circulation or sightlines you would miss on a static plan.
Each of these steps touches a different part of the app — the 2D plan, the 3D engine, and the catalog system — so by the end you have a working sense of how Sweet Home 3D fits together, without reading a manual.
Adding a second floor without the ground caving in
One of the first concerns is whether a free interior design app can handle a multi-storey house. Sweet Home 3D manages levels cleanly: you add a new level, set its elevation and floor thickness, and the walls you draw sit at that height. The 3D view shows all visible levels at once, so you can check how a staircase opening on the ground floor aligns with the landing above. Version 7.5 fixed a rendering glitch where underground levels at the same elevation displayed incorrectly, which matters if you are modelling a basement or a split-level build.
People also ask about furniture variety. The built-in catalog holds more than 1,400 objects, arranged by room and type. That range covers the basics — beds, tables, cabinets, sanitaryware — but not every style. If you search for sweethome 3d torrent you will find user-curated model packs that add mid-century, industrial, or regional furniture not in the default set. The app imports OBJ, DAE, 3DS, and LWS formats, so models from anywhere on the web slot in without conversion.
Another recurring question is whether the Mac version lags behind Windows. It does not. The macOS build runs natively on both Apple Silicon and Intel, shares the same version number, and opens files interchangeably with the Windows and Linux builds. The interface language can be switched to any of the 19 supported languages from preferences, independent of your system language.
A workflow: planning a kitchen from measurements
Start with a blank plan and set the wall thickness to 120 mm — typical for an internal stud wall. Draw the outer shell by clicking corner points and typing the exact millimetre measurement after each wall segment. If the room is 3400 by 2800 mm, type those numbers as you go rather than dragging and hoping.
Once the shell is closed, double-click inside the room to name it “Kitchen” and set the floor texture to a tile pattern from the texture library. The 3D view now shows a tiled box with no openings. Switch back to the plan and drag a window object from the catalog onto the wall that faces the garden. The app cuts the opening automatically and the 3D view updates to show daylight spilling onto the tile.
With the window placed, position the base cabinets along the longest wall. Select each cabinet from the Kitchen category and use the modifier key while dragging to duplicate it in a row. Adjust the worktop colour by editing the cabinet’s properties — the colour picker affects the counter surface without changing the cabinet doors. Place the sink under the window, the hob on the opposite run, and a tall fridge unit at the end of the line. Rotate each object with the arrow keys for fine control.
Now add a pendant light over the central work zone and set the sun position to late afternoon. The rendered 3D view shows whether the window light reaches the prep area or leaves it in shadow. If the sink corner looks dark, add an under-cabinet light strip from the catalog and adjust its intensity in the object properties. Finally, set two waypoints — one at the doorway, one at the sink — and render a short video to check that the walking route feels open. The whole workflow takes under an hour once you are familiar with the catalog layout.
Switch centimetres to inches before your first wall
Open Preferences on the Sweet Home 3D menu and check three things immediately:
- Unit of measurement. The default is centimetres. If you work in millimetres or inches, change it before drawing anything. Switching later rescales the display but does not alter the numerical values already entered, which can lead to inconsistent dimensions.
- New walls thickness and height. The default wall is 15 cm thick and 250 cm high. Set these to match the construction you are modelling — 100 mm for internal partitions, 300 mm for stone external walls, 260 cm ceiling height if your property is older. Changing these after drawing means editing each wall individually.
- 3D view rendering quality. The app defaults to a medium setting that balances speed and appearance. For final images, switch the renderer to the high-quality mode that produces photorealistic output with softer shadows and accurate reflections. Leave it on medium for day-to-day editing; your Mac will run cooler and the plan view stays responsive.
Also open the Furniture Library Editor once, even if you do not plan to create new objects. It confirms that the catalog paths are set correctly and shows where imported models will be stored. If you later download furniture packs found via a Sweet Home 3D crack search or community forum, dropping them into the right folder makes them appear in the catalog immediately.
Drawing walls before you know the room is 400 cm wide
The most common mistake is drawing walls without setting the room dimensions first. People sketch a rough shape, place furniture, then realise the scale is wrong and the room is 600 cm wide when it should be 400. Fixing this means selecting every wall and adjusting its length numerically — tedious but unavoidable. Measure once, type the values as you draw.
Another frequent error is ignoring the level system. Putting a staircase on the ground floor without adding a corresponding opening on the upper level leaves a solid floor above the stairs. The 3D view shows the staircase disappearing into the ceiling, which confuses until you realise you need to create the upper level and cut a void using the room creation tool on that level.
Beginners also tend to place furniture without checking the elevation property. Wall cabinets default to a height of 140 cm from the floor; if you do not adjust this for a low ceiling, they sit too high. The same applies to wall lights and shelves. Every object has an elevation field in its properties pane — use it.
Finally, do not rely solely on the aerial 3D view for proportion checks. The orthographic aerial view flattens depth perception. Switch to the virtual visitor view and set the eye height to 160 cm to see the room as a person standing inside it would. A kitchen island that looks compact from above can feel oppressive at eye level. That toggle is the quickest way to avoid designing a space that only works on paper.