Aspecten
 Download (1.2 GB)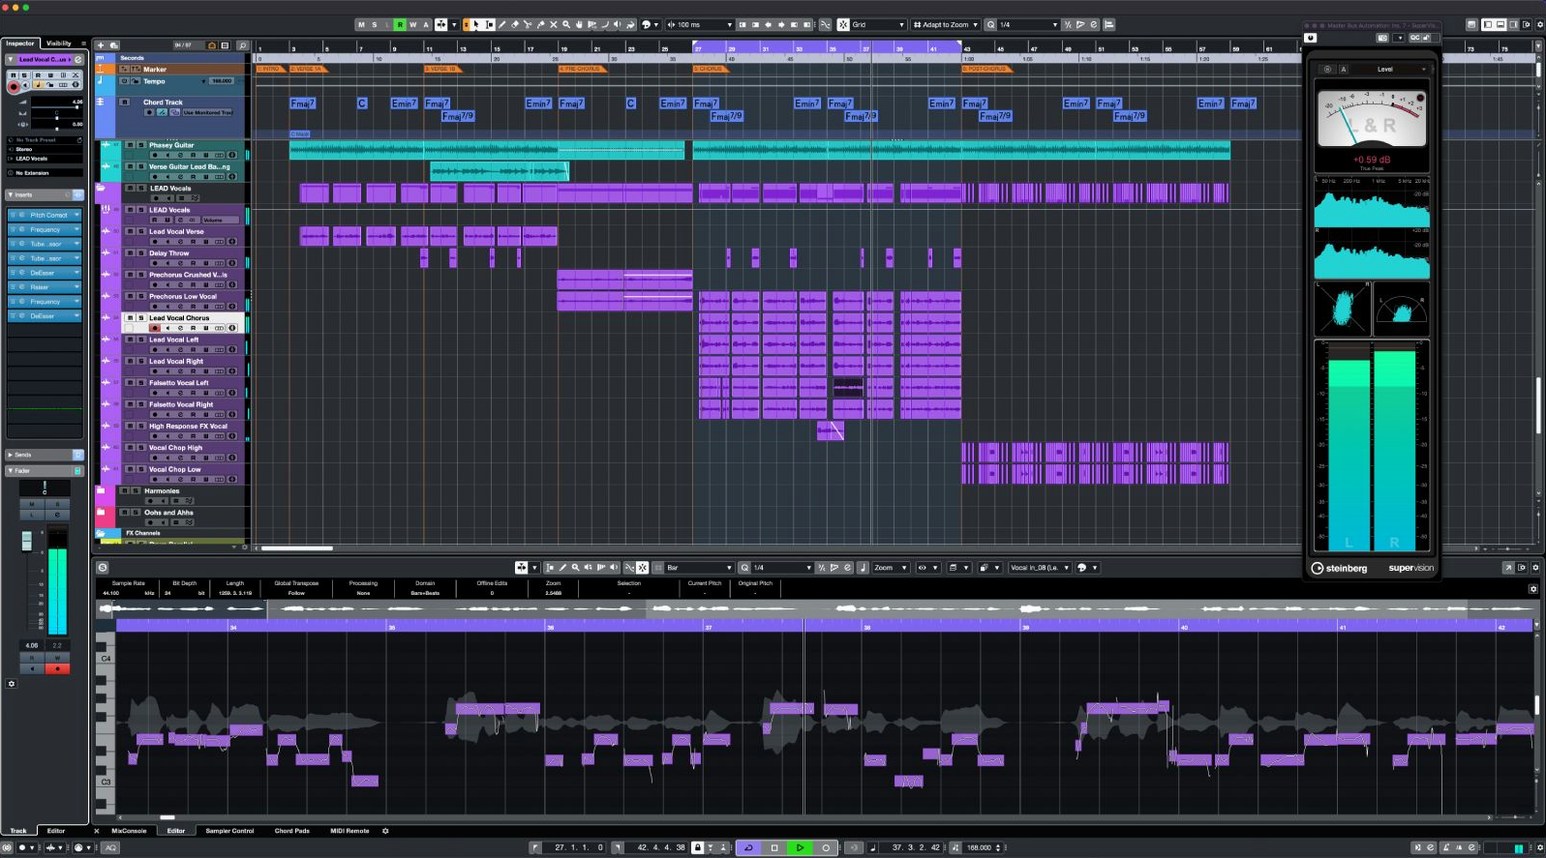
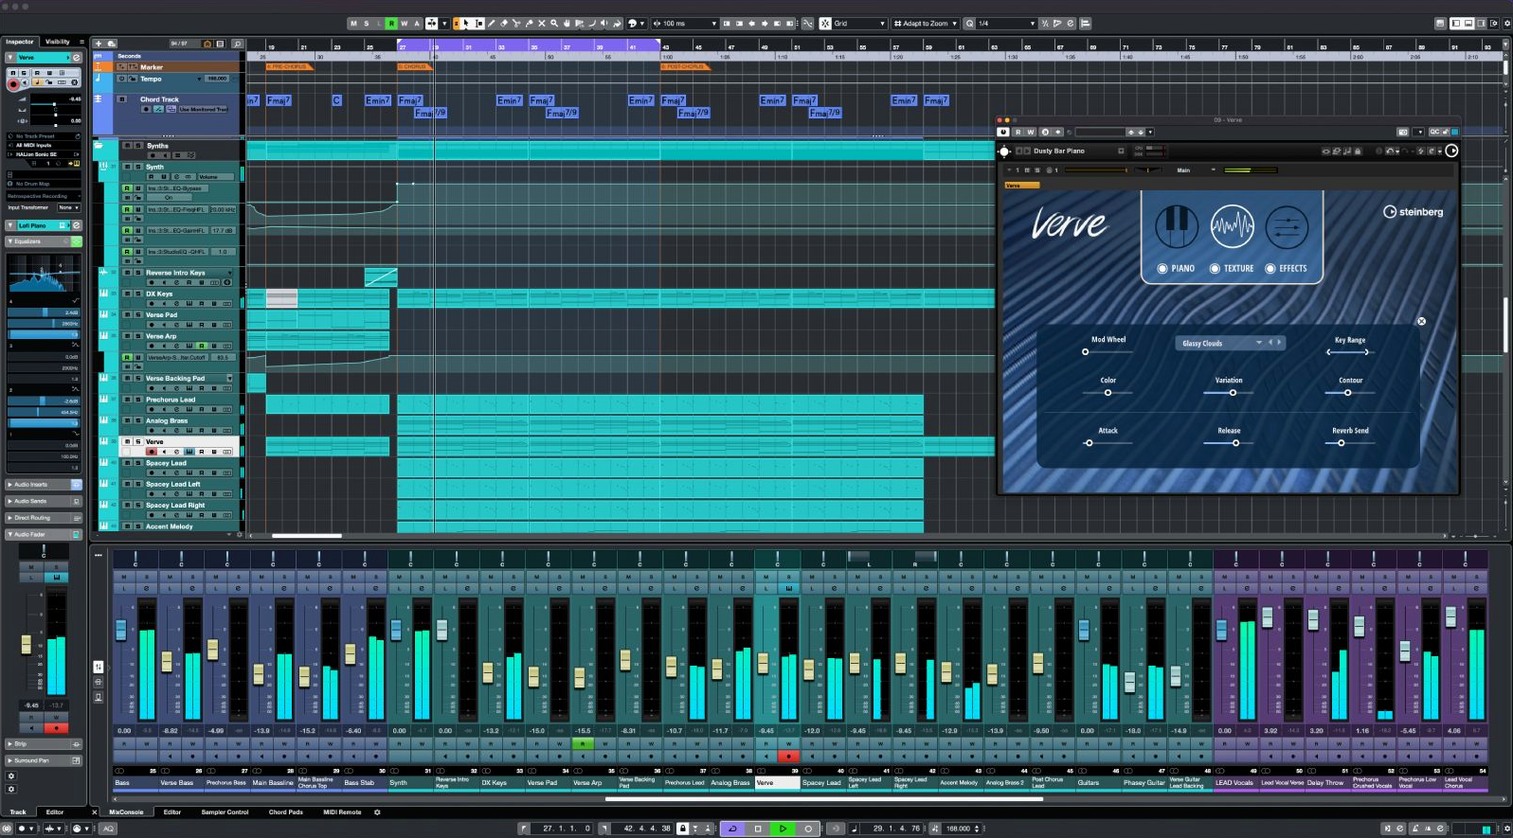
Cubase 15 runs on any Mac with macOS 13 or later, natively on both Intel and Apple Silicon processors. The download sits under 1.3 GB, which keeps the initial footprint modest for a full-featured digital audio workstation. Steinberg ships it in English and roots the design in a straightforward, uncluttered interface that stays out of the way when the session gets busy.
| Aspect | Detail |
|---|---|
| Audio resolution | Sample rates up to 192 kHz |
| Instrument slots | 64 VST slots |
| Insert effects | Up to 16 per channel |
| Routing | 256 group channels, 8 send & 64 return channels |
| Included tools | VariAudio (vocal correction), Raiser (transient-safe compression), FX Modulator |
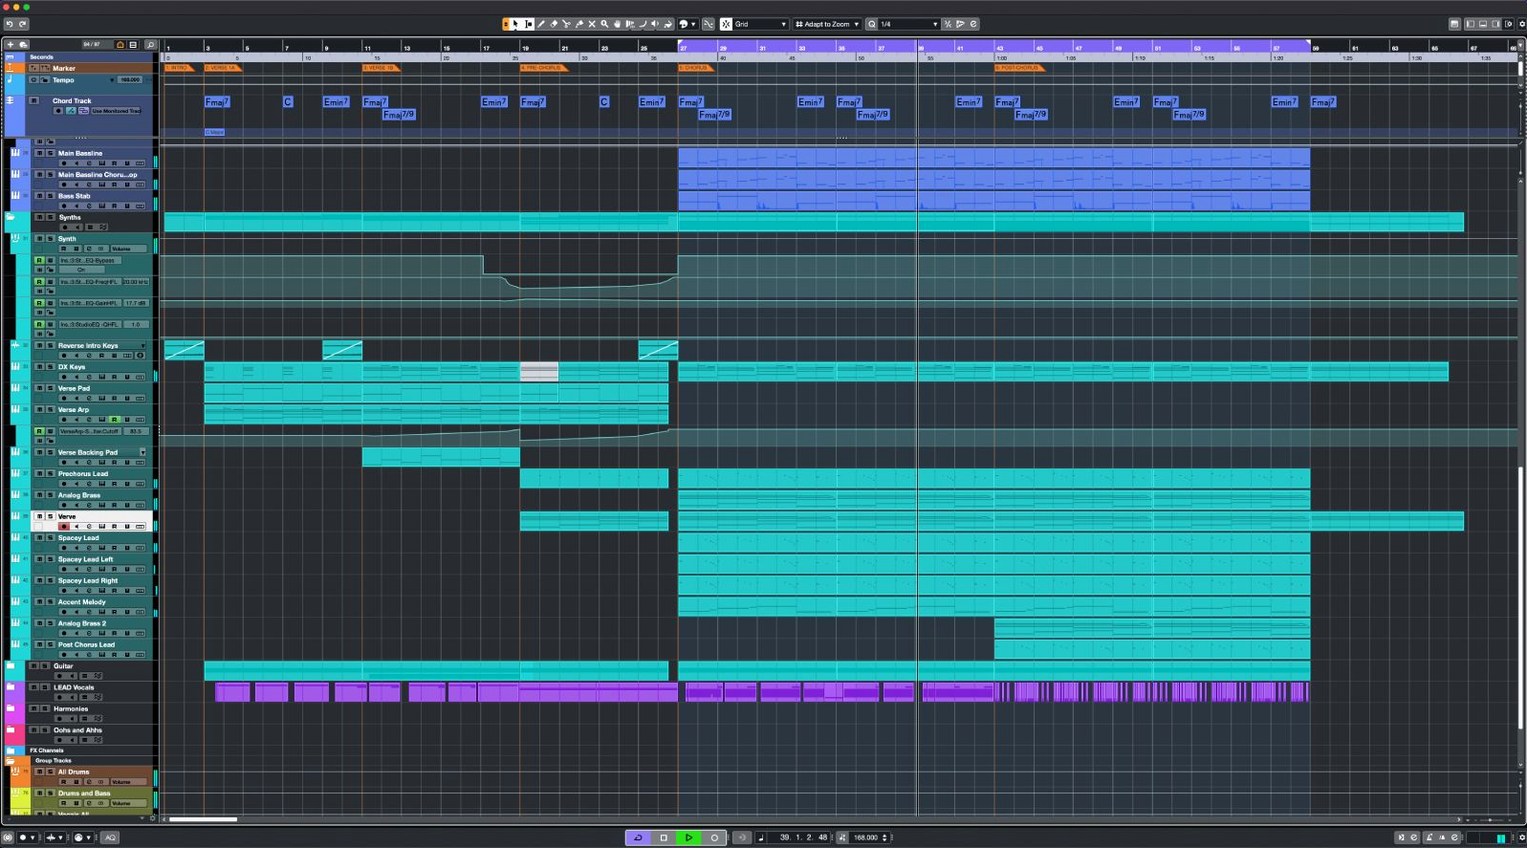
Where Cubase fits alongside other Mac tools is in its internal routing headroom. With 256 group channels and 64 return channels, it can absorb stems from a modular setup or a hardware synth rig without forcing constant track bouncing. The Audio to MIDI chords feature listens to harmony and converts it to note data, which pairs naturally with a separate MIDI editor or notation tool. FX Modulator generates shifting textures that sit somewhere between a modulation plug-in and a sound-design scratchpad, while Raiser handles loudness duties without stamping on transients. The VariAudio pitch correction engine is built in, so vocal comping and tuning happen inside one project file rather than across multiple utilities. Professionals used to splitting tasks between a recording interface, a mixing app and a mastering chain can centralise more of that work here without the routing becoming opaque.
Cold-launches under eight seconds on Apple Silicon
After running Cubase 15.0.30 across long tracking sessions and mix-heavy projects, a few patterns emerge. The application loads noticeably faster than the initial 15.0 release — cold launches on Apple Silicon settle in under eight seconds, and reopening a 60-track project with active insert chains feels responsive rather than laboured. The audio engine holds steady at low buffer sizes (64 samples tested on a recent MacBook Pro), which matters when you are recording MIDI parts with virtual instruments and need the timing tight.
Memory use sits around 1.8 GB for a moderate project with 40 tracks, a handful of VST instruments and some convolution reverb instances. That figure scales upward as you add sample libraries — Kontakt or HALion instruments push the total past 4 GB quickly — but the application releases RAM cleanly when you close a project. No creeping memory leak over a six-hour session, and the process stays under 15% CPU at idle with a dozen tracks playing back.
One stability note worth keeping in mind: third-party plug-in behaviour varies more than the host itself. Cubase handles AU and VST3 formats without complaint, but older VST2 instruments that rely on deprecated frameworks can cause a beachball when you open their editor windows. The application rarely crashes outright; more often it isolates the misbehaving plug-in and keeps the transport running. Autosave intervals are configurable and the backup folder has saved more than one session from a stuck Waves compressor GUI.
Dedicated virtual bus for routing audio between Mac apps
Cubase does not live in a bubble, and its integration points with the wider Mac ecosystem are worth mapping out. Audio routing to and from other applications uses a dedicated virtual bus — switch the studio setup to use an aggregate device that includes BlackHole or Loopback, and you can pipe a live Cubase mix into OBS for streaming or record a software synthesiser directly into QuickTime. The 256 physical input and output ceiling means the I/O matrix rarely becomes a bottleneck, even when external gear and inter-app audio channels compete for slots.
MIDI clock and MTC sync work reliably with Ableton Link-enabled apps on the same machine, though you need to set the sync source explicitly in Transport settings. The MIDI Remote integration introduced in version 15 ties into controller scripts that read surface states back into the application — useful when you want fader positions in Cubase to mirror what a Novation Launch Control Series 3 is doing, without constant manual reassignment.
Apple's accessibility and file-management features integrate in small but practical ways. The Media Bay indexes files that Spotlight already knows about, so audio dragged from Finder retains its metadata. Quick Look previews of .cpr project files work from the desktop, showing the project thumbnail. Audio Unit plug-ins validated by macOS pass through Cubase's own plug-in manager without double-handling. For users who rely on Time Machine, the project folder structure — with its separate Audio, Images and Edits subfolders — backs up cleanly and restores without breaking relative file paths.
Export options bridge to other workflows directly. Bouncing stems with channel strip processing intact means a mixing engineer can pick up raw tracks in Pro Tools without rebuilding gain staging. AAF and OMF export formats let video editors pull a Cubase sound design session into DaVinci Resolve or Final Cut Pro without manual alignment. The Dolby Atmos renderer outputs ADM BWF files that Apple Music accepts for spatial audio delivery — no intermediate conversion step required.
MIDI timing drifts when Constrain Delay Compensation stays off
New users tend to trip over the same handful of habits, and spotting them early saves hours of frustration.
Ignoring the Constrain Delay Compensation button. When you record a MIDI part through a channel loaded with high-latency plug-ins, the timing drifts. The small clock icon on the transport bar disables latency-inducing inserts on record-enabled tracks. Forgetting it exists leads to quantised parts that still feel stiff because the original performance was monitored late.
Working without a template. Cubase opens to an empty project by default. Building a routing matrix from scratch every session — adding group channels, setting up headphone mixes, configuring Control Room — eats the first 20 minutes of every session. Saving a template with routing, track colours and a basic reverb send in place removes that friction entirely.
Misunderstanding the Media Bay scope. The Media Bay does not show everything on your drive by default. It scans defined locations. A beginner who drags a sample folder into the Finder but never adds it to the Media Bay scan paths ends up convinced the browser "does not see" their library. Defining scan locations and letting the database index overnight fixes the gap.
Using VariAudio before locking tempo. VariAudio pitch segments align to the project tempo grid. If the vocal was recorded to a free-time piano track and the tempo map was never created, pitch editing snaps to the wrong beat divisions. Running tempo detection on the guide track first, then applying VariAudio, keeps the segments musically anchored.
Overloading the master bus insert chain. A beginner instinct is to stack a compressor, EQ, limiter and tape emulation on the stereo out from the start. Mix decisions made against that processing chain become difficult to undo later. Leaving the master bus clean during tracking and early mixing, then adding Raiser or a final limiter only when the balance is settled, keeps the mix translatable to other systems.
Factory default records at 44.1 kHz instead of your project rate
Out of the box, Cubase 15 makes some conservative choices. A few adjustments bring the application closer to how most producers actually work.
Record file format. The factory default records at 44.1 kHz / 24-bit. Head to Studio > Project Setup and set the sample rate to match your interface and the intended delivery format — 48 kHz for video work, 96 kHz if you record acoustic instruments and want the extra headroom. Bit depth should stay at 24-bit or switch to 32-bit float if you record unpredictable dynamic material and want to recover clipped transients later.
Auto-save interval. The default is 15 minutes. Drop it to 5 minutes under Preferences > General and set the maximum number of backup files to 20. The small disk overhead is worth it when a plug-in hangs and you need a recent restore point.
Control Room activation. Many new users never enable Control Room at all, which means they monitor through the main stereo bus and cannot set up separate cue mixes. Switch it on in Studio > Audio Connections, assign a physical output pair to the Control Room channel, and you immediately gain independent headphone sends and a dedicated listen bus.
Plug-in window behaviour. By default, plug-in editors open as floating windows that can hide behind the arrange view. In Preferences > Plug-ins, enable "Always on Top" for plug-in windows. The setting keeps a compressor GUI visible while you adjust track levels in the main window behind it.
Scroll behaviour during playback. The default scroll mode stops page-follow as soon as you click anywhere. Switching to "Page Scroll" under the transport bar's arrow menu makes the arrange view follow the playhead continuously, which suits long editing passes where you need to see waveforms scrolling past without manual dragging.
Tempo-detection engine rewards composers working to picture
Cubase 15.0.30 rewards certain workflows more naturally than others. Understanding where the application fits helps avoid the square-peg frustration of using it for tasks another tool handles better.
Composers working to picture. The tempo-detection engine, combined with the warp grid and ruler tracks for timecode, makes scoring a natural fit. A composer can import a QuickTime reference, set markers at hit points, and let the tempo track flex around those cues rather than locking to a fixed BPM. The 64 VST instrument slots accommodate large orchestral templates — string libraries, brass sections, percussion palettes — without needing a secondary hosting application. Expression maps for sample libraries like Spitfire or Orchestral Tools load directly and translate articulation key switches into lanes in the Key Editor, which keeps the piano roll readable when a track contains staccato, legato and pizzicato on the same staff.
Vocal producers and editors. VariAudio 4 inside Cubase 15 handles polyphonic pitch correction alongside the standard monophonic mode, which means a vocal comp that includes backing harmonies can be tuned without splitting parts across separate tracks. The Audio to MIDI chords feature extracts harmony from a piano guide and maps it to a chord track, so a vocal producer can see the underlying progression while editing pitch segments. Combine that with the Scale Assistant locking the Key Editor to the detected key, and re-pitching background vocals to match the chorus harmony becomes a single-click operation.
Hardware-studio owners. A user with a rack of outboard compressors and a 16-channel summing mixer benefits from the 256 physical I/O paths and the External FX plug-in. Patching a hardware SSL-style bus compressor into a group channel works like inserting a software plug-in — the send and return routing accounts for the round-trip latency automatically, and the ping function measures it without guesswork. The MIDI Remote scripts for controllers like the Novation Launch Control Series 3 mean fader banks map to Cubase's mixer in banks of eight, so a hybrid desk setup feels coherent rather than bolted together.
Sound designers who build complex textures. The FX Modulator invites experimentation that goes beyond standard LFO assignments. Its envelope follower can track an audio input — a drum loop, a dialogue clip — and apply the amplitude contour to filter cutoff on a sustained pad. Layering three or four instances across different insert slots creates evolving drones that shift with the source material. Combined with the 16 insert slots per channel, a sound designer can build processing chains that would require multiple auxiliary tracks in other DAWs.
Users who benefit less. Someone who works entirely with pre-made loops and needs only eight tracks may find the routing architecture overbuilt. A producer who relies on a single software instrument and records no audio might be better served by a lighter sequencer. Cubase's strength lies in depth — the more a project demands in terms of track counts, hardware integration, tempo manipulation and detailed editing, the more the application justifies its footprint. When a session stays small and self-contained, half the feature set remains untouched, which is not a flaw but a mismatch of tool and task.