Aspecten
 Download (212 MB)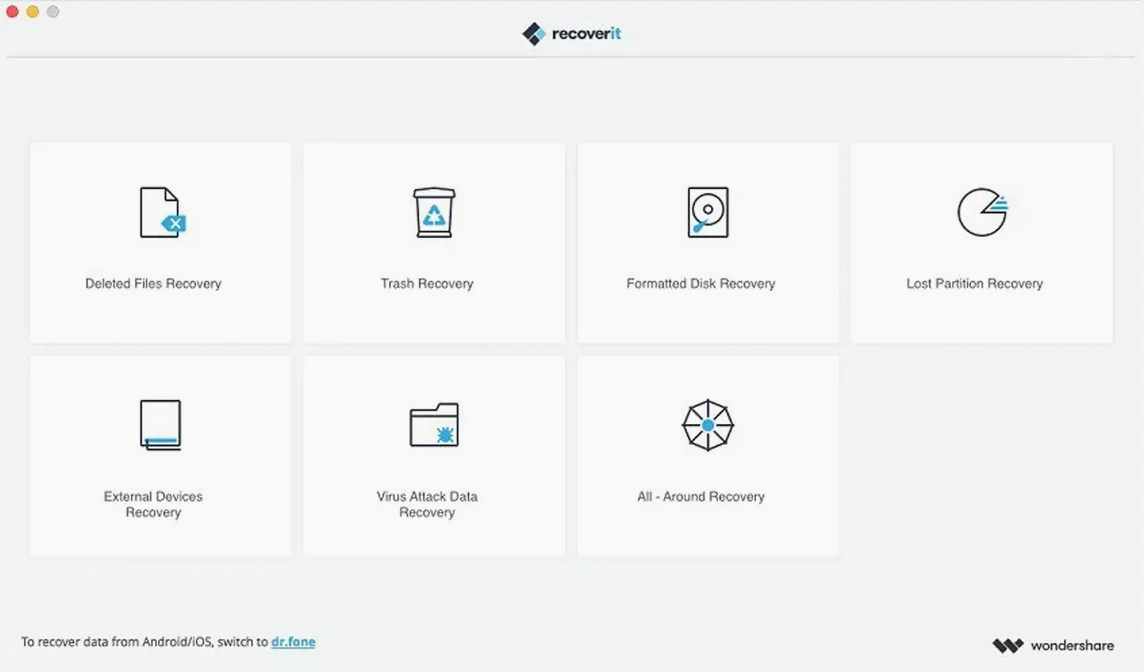
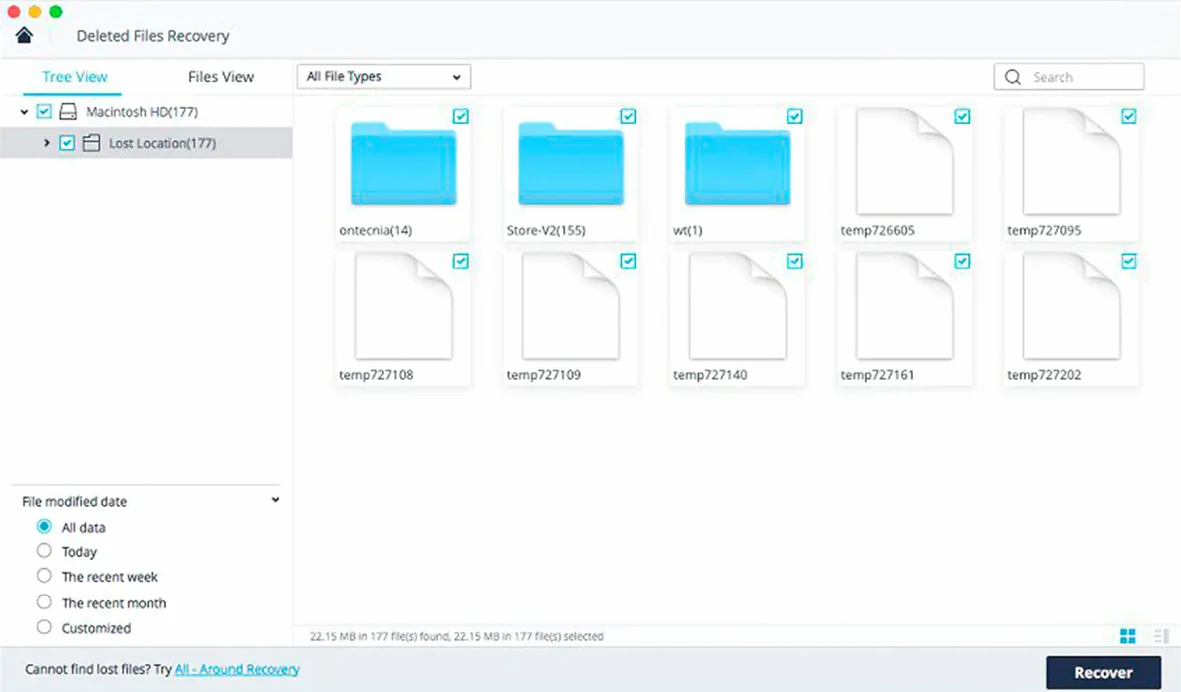
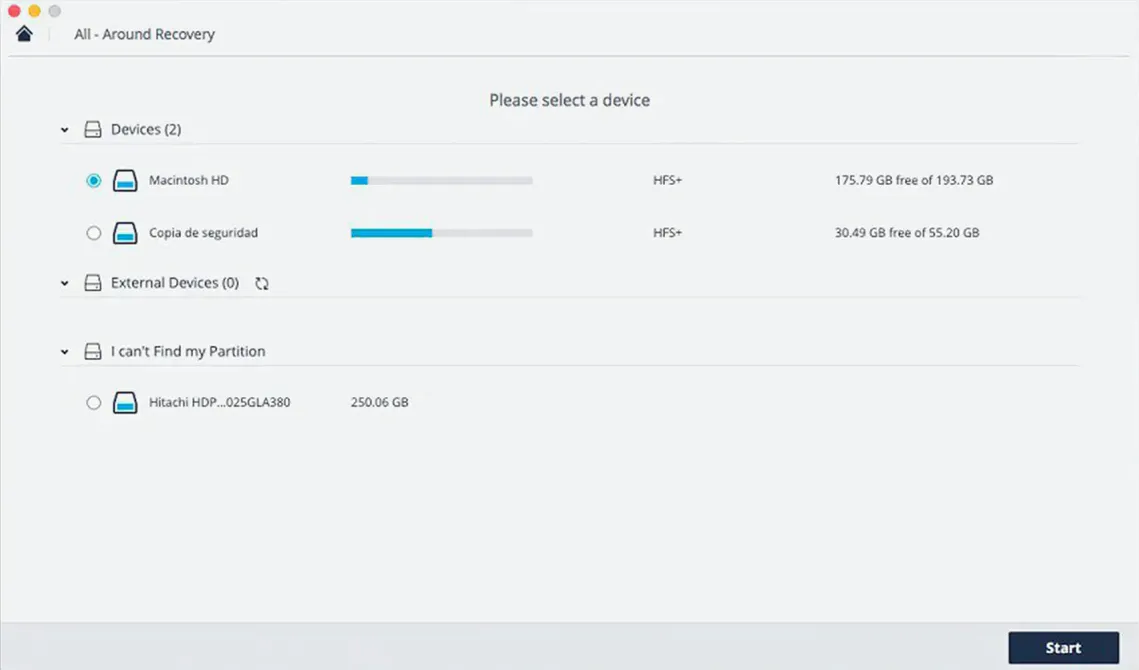
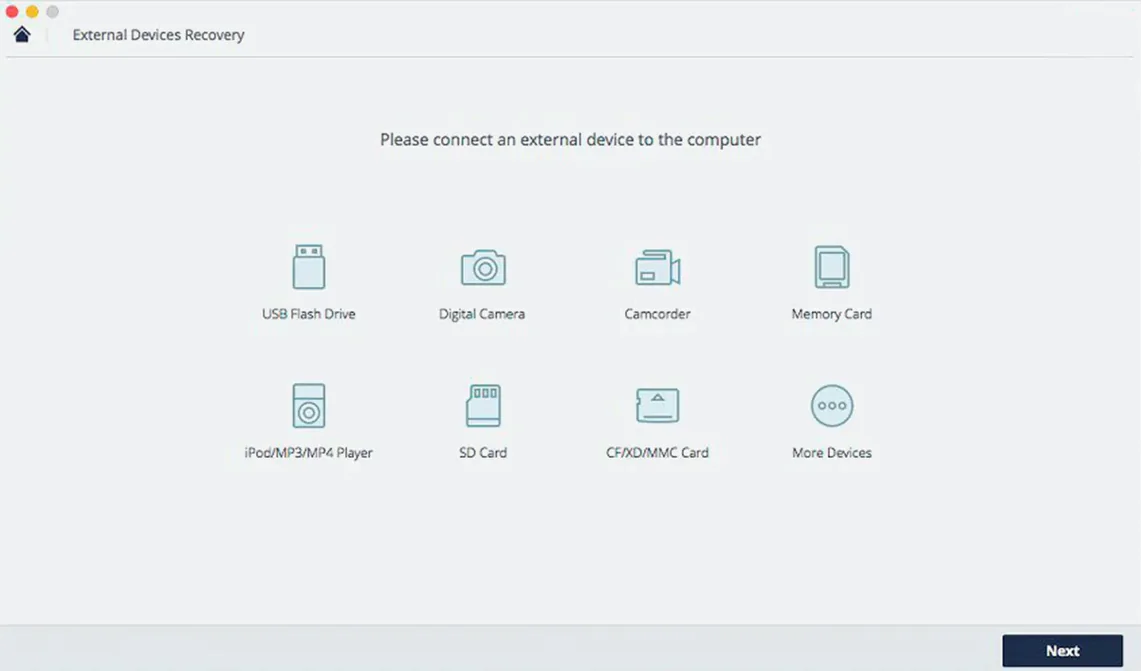
One scan. That is the core of what the official guide describes: select a device, run a scan, and recover what was lost. Recoverit 14.0.20.6, built for Intel Macs, offers a straightforward path to retrieving deleted files from internal drives, external disks, and other storage media.
What does the official guide actually describe?
The process is linear. You choose a storage device, the app scans it, and recoverable files are listed for restoration. There is no mention of guaranteed results for overwritten sectors or mechanically failing drives. The tool works with what the file system still references, so the sooner a scan runs after deletion, the more complete the results tend to be.
Where does it run and what should you expect?
Recoverit runs on macOS 10.14 and later, with interface support for English, German, Spanish, Italian, Portuguese, French, and Japanese. It is an Intel binary, which means Apple Silicon Macs run it through Rosetta 2. The installation itself requires a Gatekeeper bypass via Terminal, a step that adds a small friction point for users unfamiliar with command-line prompts.
How Recoverit fits into a recovery workflow with other tools
Data recovery rarely happens in isolation. Someone who reaches for Recoverit is often already using Time Machine, copying files off a camera card in Finder, or checking whether a document exists in an iCloud backup. Understanding where the app sits among these tools prevents duplicated effort and wasted scan time.
Time Machine remains the first port of call for accidentally deleted files on a Mac. If the file was present during the last backup, restoring through Time Machine takes seconds. Recoverit becomes the sensible next step when the file never made it into a backup, when the backup drive was also affected, or when the loss happened on an external volume that Time Machine does not watch. The same applies to cloud-synced folders. Many users assume a deleted iCloud Drive file is gone for good, only to find it in the Recently Deleted folder on iCloud.com. Checking that folder before running a deep scan avoids an hour of unnecessary scanning.
For photographers and videographers pulling files from SD cards or CFexpress cards, Finder and Image Capture handle straightforward copying. Recoverit enters the picture when a card was formatted before the transfer, when the camera reported a card error, or when files vanished mid-import. In those cases, recovering directly from the card — without writing anything new to it — is the standard advice. The same logic extends to external drives used for media offloads on set.
Disk Utility and its First Aid function deserve a mention. If a drive fails to mount, running First Aid can sometimes restore the partition table without data loss. When First Aid reports the volume as unrecoverable, Recoverit can still scan the raw device for file signatures. This kind of handover — from macOS repair tools to third-party recovery — is a pattern that appears often in data-loss situations.
The Terminal command diskutil list helps identify which disk identifier belongs to an unmounted drive. Knowing the identifier before launching Recoverit removes guesswork when the app presents a list of connected devices with similar names. Users who run sudo lsof | grep deleted in Terminal can also spot files held open by a process but no longer visible in Finder. Recovering those through Recoverit is unnecessary because the data is still accessible to the process holding the file handle.
For more complex cases involving a failing drive that clicks or spins down intermittently, Recoverit works best as a second-stage tool. The first stage is creating a block-level clone with ddrescue on Linux or a hardware duplicator. Scanning the clone rather than the dying original preserves whatever readable sectors remain. The official guide does not cover this workflow, but it is standard practice among recovery technicians and applies to any software-based recovery attempt, including Recoverit.
Installing on the same drive overwrites lost files
The most frequent mistake is installing Recoverit onto the same drive where the lost files were stored. Every write to that drive risks overwriting the very data someone hopes to recover. On a Mac with a single internal SSD, this is unavoidable, but the damage can be minimised by quitting every other application and stopping background tasks like Spotlight indexing before the installation. A safer approach is to run Recoverit from an external drive or to use another Mac where the target drive can be connected as a secondary volume.
Another common misstep is starting a scan without unplugging unnecessary external drives. Recoverit lists all connected volumes, and scanning the wrong 4 TB external disk by accident wastes time and puts the wrong data under the spotlight. Physically disconnecting drives that are not involved in the recovery keeps the device list tidy and reduces the chance of selecting the wrong target.
Many beginners stop at the first scan pass and assume nothing is recoverable. Recoverit offers a quick scan and a deep scan. The quick scan checks the file system directory structure for recently deleted entries. The deep scan reads raw sectors and searches for file signatures. Files that do not appear in the quick scan often surface during the deep scan, albeit without original file names. Skipping the deep scan leaves a large portion of recoverable data untouched.
A subtler error involves previewing files and assuming the preview guarantees a full, intact recovery. The preview feature reads enough data to render a thumbnail or play the first few seconds of a video. It does not verify the entire file. A JPEG that previews perfectly may still have corruption in the lower portion of the image; a video that plays its opening frames may freeze at the three-minute mark. Testing recovered files thoroughly — opening documents, scrubbing through videos, checking PDFs page by page — catches partial corruption that the preview overlooks.
Users also misinterpret the scan results list. Files found during a deep scan often carry generic names like FILE001.jpg or VID0002.mp4. Sorting by date modified or file size helps narrow the search, but recovering every file that matches a desired extension, without checking content, leads to a folder full of duplicates and system files that happened to share the same signature. Filtering by file size range before recovery cuts down the noise considerably.
Finally, some users attempt recovery on a drive that is encrypted with FileVault and not unlocked. Recoverit cannot read encrypted volumes unless they are mounted and unlocked through macOS. If a FileVault volume refuses to mount, the recovery must start with the encryption layer, which goes beyond what Recoverit can address. Unlocking the drive in Disk Utility first is a prerequisite.
Narrow file type selection before scanning
Recoverit opens with sensible defaults, but a few adjustments make the recovery process faster and the results more manageable.
Scan location filtering. Before clicking the scan button, narrow the file type selection. The app lets you choose categories — documents, photos, videos, audio, archives — or specific formats. Scanning for everything when you only need a missing Pages document adds time and clutters the results. Deselecting video and audio when hunting for a single spreadsheet trims scan duration noticeably on large drives.
Deep scan toggle. The quick scan runs first by default. If the file was deleted recently and the drive has seen minimal use since, the quick scan alone often finds it. Toggling off the automatic deep scan follow-up saves anywhere from twenty minutes to several hours. You can always run the deep scan manually afterwards if the quick scan comes up short.
Preview quality. Recoverit generates previews for images and videos during the scan, which consumes processor cycles. On older Intel Macs, reducing the preview quality or disabling it entirely keeps the machine responsive while the scan runs in the background. The setting lives in the preferences pane under the preview section.
Recovery destination. The app prompts for a destination folder at the moment of recovery. A common and easily avoided pitfall is saving recovered files back to the same drive they came from. Changing the default suggestion to a folder on a separate physical drive — and making that a habit — prevents the tool from overwriting sectors that still contain recoverable fragments of other files you might want to retrieve later.
Language selection. The interface ships in seven languages, and the installer picks up the system language automatically. Switching to English in the preferences can be helpful when following community-written recovery guides or forum discussions, where menu items and button labels are almost always referenced in English.
Pause and resume deep scans mid-session
Recoverit includes several workflow details that the official guide mentions only in passing, if at all. Noticing them early saves clicks and frustration.
- Pause and resume during deep scans. The deep scan can be paused and resumed later. This is useful when scanning a large external drive overnight — you can pause in the morning, eject the drive safely, and resume the scan in the evening without losing progress. The scan state is saved to a temporary file in the app's support directory.
- Filter-as-you-type in the results list. Once the results populate, a search field sits at the top of the file list. Typing a partial file name, extension, or even a date string narrows the visible items instantly. Users who scan 500 GB drives and end up with tens of thousands of results often miss this field and scroll manually, which is unnecessary.
- Sorting by file path. The results view defaults to sorting by file type. Switching the sort column to Path groups files by their original folder structure, which makes it much easier to find a document when you remember where it used to live — "it was in the Projects folder, inside Documents" — even if the file name escapes you.
- Recovering a single file from a large scan. The checkbox selection supports Command-click for non-contiguous selection and Shift-click for ranges. Right-clicking a selected file offers a Recover Selected option that bypasses the main recovery button. This is faster when you have identified exactly three files among thousands.
- Drag-and-drop device selection. Instead of navigating the device list with the mouse, dragging a mounted volume icon from the desktop directly onto the Recoverit window initiates a scan for that volume. The app recognises the drop and skips the device selection screen entirely.
- Keyboard shortcut for scan start. Pressing Command-R on the device selection screen starts the scan for the currently highlighted drive. It is the same action as clicking the Start button but keeps your hands on the keyboard.
- Log file location. Recoverit writes scan logs to
~/Library/Application Support/under a Wondershare folder. When a scan behaves unexpectedly — stopping early, skipping sectors, missing a known file — the log sometimes contains error codes or sector-read failures that explain what happened. This is useful when seeking help on forums, where providing the log snippet often gets a faster diagnosis than describing symptoms alone. - File signature list for deep scan. The deep scan relies on a database of file signatures. The app occasionally updates this database between versions, expanding support for newer camera RAW formats or document types. Checking the preferences pane after updating Recoverit reveals whether new file types have been added to the signature list. A format that was unsupported in version 13 might be recoverable in 14 without any change to the user interface.
Scan speed and format coverage jumps from version 12
Version 14.0.20.6 represents a point release in the 14.x line, and the most visible changes from earlier versions centre on scan performance and format coverage rather than interface redesigns. Users upgrading from version 12 or 13 notice the differences in three areas of daily use.
Faster deep-scan initialisation on APFS volumes. Earlier versions spent noticeably more time on the initial enumeration pass when scanning APFS-formatted drives. The current build shortens this phase by reading volume metadata more efficiently. On a 1 TB APFS SSD, the time from clicking Start to seeing the first recoverable files appear is now shorter, which reduces the feeling that the app has stalled. The actual sector-by-sector deep scan still takes as long as the drive's read speed dictates, but the upfront wait is less pronounced.
Expanded video format recovery. The signature database in version 14 recognises more video codec variants, particularly from action cameras and drones that wrap H.264 or H.265 streams in non-standard containers. Users recovering footage from GoPro, DJI, or dashcam memory cards have reported better results with fragmented video files that older versions either skipped or recovered as unplayable data. This matters in everyday use because the difference between a recoverable clip and a corrupt one is often just a header the app can reconstruct.
Recovery of files from APFS snapshots. macOS uses APFS snapshots for Time Machine local backups and system updates. If a file was present during a snapshot and deleted afterwards, the current Recoverit build can sometimes pull it from the snapshot data that remains on the volume. This is not a replacement for Time Machine — snapshots are temporary and get purged as the drive fills — but it adds a short-term safety net for files deleted within the past 24 to 48 hours on busy volumes. Users who notice a missing file the morning after a late-night cleanup session benefit from this the most.
Handling of large NTFS volumes via Paragon and Tuxera. Earlier Recoverit releases occasionally misidentified NTFS external drives when third-party NTFS drivers were installed. The current version resolves this by querying the mount point through macOS rather than probing the file system directly. Drives mounted with Paragon NTFS or Tuxera NTFS now appear with correct volume labels and sizes in the device list, and scans proceed without the "unsupported file system" warnings that sometimes appeared in version 13.
Refined preview rendering for HEIC and RAW. The preview pane now renders Apple's HEIC format and several additional RAW profiles at full resolution, whereas older versions sometimes displayed a low-resolution embedded JPEG preview instead. For photographers sorting through recovered RAW files, being able to check critical sharpness or exposure in the preview window reduces the number of files that need to be recovered just to be checked and then discarded.
None of these changes alter the fundamental workflow — select a device, scan, preview, recover —