Aspecten
 Download (1.6 GB)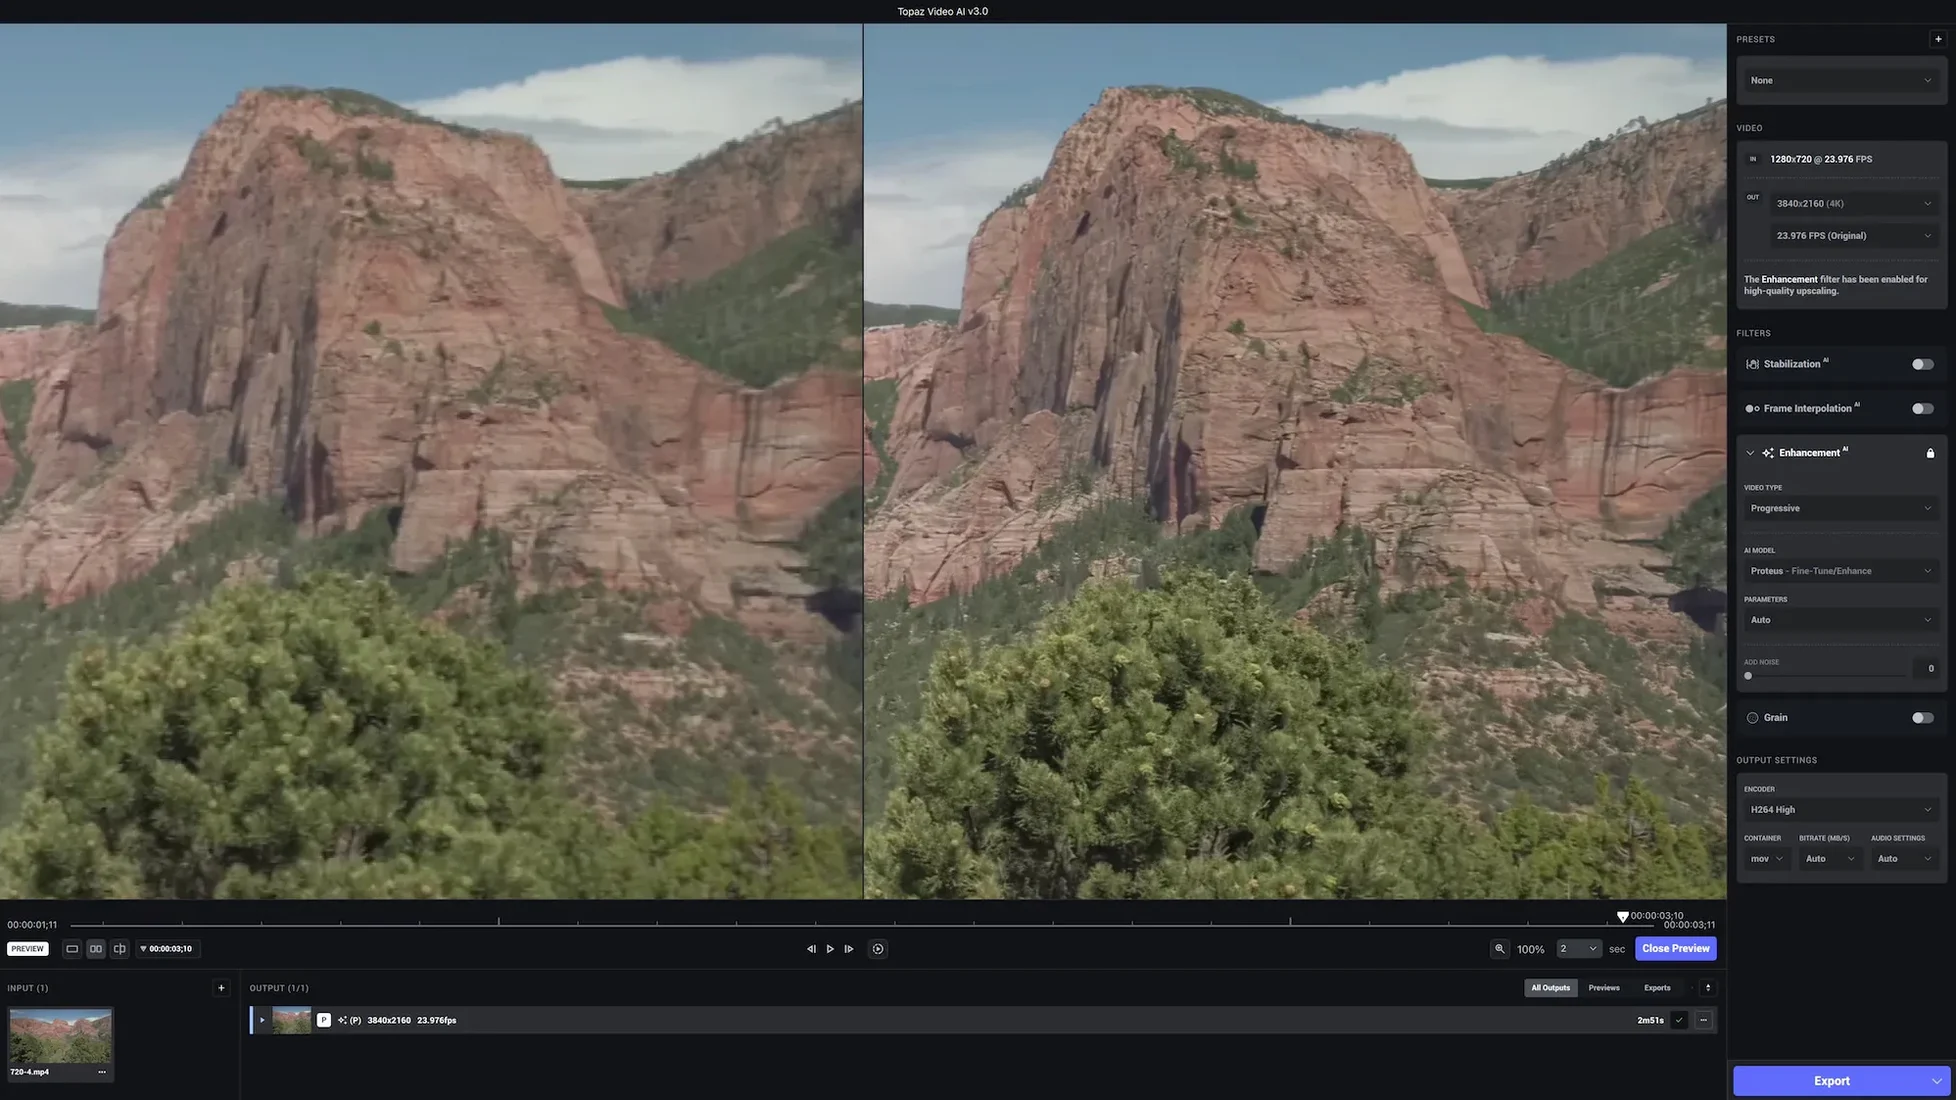
Topaz Video AI is a desktop application that uses machine-learning models to improve video quality through upscaling, noise reduction, sharpening, and frame-rate conversion. It sits downstream from an editor or media library: you hand it finished cuts or archival footage that need a technical polish before final export or archiving. Where a non-linear editor applies real-time effects across a timeline, this app processes whole clips offline, trading time for perceptual quality that temporal denoisers and scalers built into editing software rarely match.
| Role | Fit beside common Mac tools |
|---|---|
| Final Cut Pro / DaVinci Resolve | Export a master, enhance it in Video AI, then use the result as a new source clip. Not a real-time plug-in. |
| HandBrake / Compressor | Transcoding comes after enhancement. Video AI focuses on pixel-level reconstruction, not bitrate optimisation or container muxing. |
| QuickTime Player / IINA | Preview the before-and-after. The app is not a player; it produces files you inspect elsewhere. |
When you need to recover detail from old interlaced MiniDV tapes or upscale an HD timeline to 4K without the plastic look of a bicubic resize, the app’s AI models offer a path that feels closer to re-photographing the scene than to filtering it. It also generates intermediate frames for slow-motion or frame-rate standardisation, which can save a round-trip through optical-flow tools that editors already own but may not trust for critical shots. The trade-off is processing time and disk space; the output files are large, and every pass runs outside the real-time preview loop you are used to.
Start with a 15-second problem clip, not a two-hour project
Once the .pkg is installed and the patch applied, resist the urge to throw a two-hour project file at the queue. Start with a 15-second clip that contains the problem you want to solve — low-light grain, soft focus, interlacing — and run it through one model at a time. Observing how Artemis handles film grain versus how Proteus treats sensor noise teaches you more in an afternoon than reading model descriptions ever will.
Keep an eye on the preview pane, but do not trust it completely. The small window uses a downscaled render that masks fine texture decisions. Export a 5-second test segment before committing to a full clip. Switching the preview export setting to Original resolution under the comparison view gives a more honest read on what the model is doing to skin tones and edge detail.
Set aside a dedicated scratch folder on a fast external drive. The intermediate frames generated during frame-rate conversion can balloon a project folder quickly. On an Apple Silicon Mac, the Neural Engine handles inference efficiently but the disk I/O becomes the real bottleneck — an NVMe enclosure over Thunderbolt keeps the queue moving when you batch half a dozen clips overnight.
Naming discipline pays off immediately. A file called interview_A_roll.mov fed through the Gaia upscaler at 200% and the Chronos frame-rate model at 2× slow-motion should leave the queue as something like interview_A_roll_Gaia2x_Chronos2x.mov. The app does not embed processing metadata in a sidecar, so the filename is your only record of what was done when you revisit the clip six weeks later.
Finally, before you process anything you care about, open the preferences and confirm the temporary files path points at a volume with at least 100 GB free. The app writes large intermediate frames during long runs and a full boot drive can halt a queue silently overnight.
Right-click Patch.command when Gatekeeper blocks it on newer macOS
A handful of problems surface regularly across different Mac setups. Most have straightforward fixes once you recognise the symptoms.
Patch.command refuses to open on newer macOS builds. Right-click the file, hold Option, and choose Open. If Gatekeeper still blocks it, head to System Settings → Privacy & Security and scroll to the bottom where a button lets you run it anyway. On some machines the terminal window flashes an error about permissions; running chmod +x on the file beforehand often clears that.
Preview pane shows a black frame or frozen image. This usually indicates the model has not finished loading into memory. Wait for the progress spinner beside the model dropdown to vanish before scrubbing. If the problem persists, toggle to a different model and back. On M1 and M2 Macs, the first inference after a cold start takes longer because the Neural Engine needs to compile the model graph; subsequent runs are faster.
Export stalls at 99%. The app has finished processing frames and is muxing the audio stream back into the container. Large files with multi-channel audio can sit at this stage for several minutes. Do not force-quit. If it hangs longer than 15 minutes, check whether the destination drive has enough space for the final file plus the temporary muxed copy.
Chronos frame-rate model produces warped edges on fast motion. The default sensitivity setting is tuned for moderate movement. For sports footage or handheld pans, reduce the sensitivity slider by 10–15 points and re-render a test segment. The model estimates optical flow and a lower sensitivity forces it to be more conservative about where it invents intermediate frames.
Audio drifts out of sync after frame-rate conversion. This happens most often with variable frame-rate source footage from screen recordings or phones. Transcode the source to a constant frame rate in HandBrake before feeding it to Video AI. The app honours the source timebase, and variable-rate clips confuse the timeline the model works against.
Those encountering activation hiccups or searching for a topaz video macos workaround on Apple Silicon will find the patch process described above handles most cases, though a cold reboot after the first run settles lingering code-signing checks that can trip the app on wake-from-sleep.
Workflow: restoring a worn DVD rip for a documentary insert
Suppose you are cutting a documentary and the archive has supplied a 720×480 MPEG-2 rip from a DVD released in 2003. The footage is soft, noisy in the shadows, and shows combing artifacts from a poor deinterlace pass. You need a clean 1080p clip that holds up on a cinema screen.
Begin by trimming the source to the exact in and out points you need. Working with a short segment keeps the processing queue manageable and lets you iterate settings quickly. If the clip has not been properly deinterlaced, set the input field order to Upper Field First or Lower Field First — trial and error on a 2-second segment will reveal which. The Dione model handles interlaced sources natively and often outperforms a pre-deinterlaced file fed to another model.
With the source interpreted correctly, stack two enhancements. First, Dione at 1× output resolution to deinterlace and clean the fields into progressive frames. Enable its built-in denoising at a low setting — 10–15 is enough to quell MPEG blocking without smearing film grain. Export this as a ProRes 422 intermediate. Second, load that intermediate back and apply Proteus at 200% upscale with the manual sliders tuned to the clip: raise Recover Detail to around 40, keep Reduce Noise at 20, and pull Sharpen back to 0 so the model does not over-crispen what should look like 2003 video. Check hair edges and fabric textures in the preview at 100% zoom. If faces look waxy, lower the detail slider by 5 points and re-test.
Export to ProRes 422 HQ at the timeline resolution. Bring the result into your editor and drop it onto the timeline above the original. A quick A/B toggle between the two clips confirms the model preserved the colour response of the source — Proteus rarely shifts white balance, but it can amplify compression artefacts in the blue channel if you push the denoise slider too low. The whole process, from trim to final 1080p clip, takes under ten minutes of your attention though the Mac will churn for longer depending on clip length.
Cleaning chroma noise from a DSLR talking-head shot at ISO 3200
You sit down on a Tuesday evening with an exported talking-head interview. The director shot it on a DSLR at ISO 3200 in a dim office, and the shadow side of the subject’s face carries visible chroma noise. The timeline is cut at 1080p but the delivery spec asks for 4K.
You open Video AI and drag the ProRes export from the Finder straight into the file list. The thumbnail pops up. In the right-hand panel you set Output Resolution to 3840×2160, then pick Artemis from the model dropdown because it handles mid-to-high-quality HD sources cleanly without introducing the painterly look that Gaia sometimes leans toward. The preview pane updates and shows a split view: left side original, right side processed. You scrub to a frame where the subject’s hand rests on a dark table. The noise is gone. The knuckle detail is preserved. You zoom the preview to 100% and check the catchlight in the eyes — still round, not smeared into an almond shape.
You notice a slight plasticky sheen on the cheek. You enable Manual Settings and nudge Reduce Noise from the default of 20 down to 12, then bump Recover Detail from 30 to 38. The split-screen refreshes. The cheek texture returns. Satisfied, you add a second clip to the queue — the B-roll of the office exterior, shot on the same camera but properly exposed. For this clip you switch to Gaia at 200% because the footage is clean and Gaia’s reconstruction of brickwork and foliage reads as more natural on architectural details.
You click Start Processing and the queue begins. The M1 Max spins up its efficiency cores for the Neural Engine workload while the fans stay quiet. You switch to Safari and answer emails. Twenty minutes later both clips sit in the output folder as 4K ProRes files. You open them in QuickTime Player, scrub through a few seconds to confirm audio sync, then close the app. The session was three clicks of setup, a few minutes of critical looking, and a background render that cost you no creative time beyond the initial inspection.
For those who have explored routes like topaz crack download mac or topaz cracked mac to evaluate the app before committing, the patch-based approach on version 1.7.1 follows the same install pattern: .pkg first, Patch.command second, and a quick permissions dance if macOS Golden Gate gets in the way.
A 480p web rip cannot yield detail the 8K upscaler needs to work
One of the most frequent missteps is treating Video AI as a one-click fix for any footage, regardless of source quality. Feeding a heavily compressed 480p web rip to the 8K upscaler does not recover detail that was never captured. The models reconstruct plausible pixels, but they cannot invent cheekbone texture or fabric weave from a blocky mush. A better approach is to upscale modestly — 150% to 200% — and let the timeline scaling in your editor handle the rest.
Another common error is stacking models in a single pass. New users sometimes set the input to interlaced, pick Dione for deinterlacing, then wonder why the output still shows combing. The app processes the primary model first; secondary corrections like frame-rate conversion happen in a defined order. If you need deinterlacing and upscaling, run them as two separate passes. The extra disk write is worth the cleaner result.
Over-sharpening through the manual sliders is surprisingly easy to do and hard to un-see later. A setting that looks crisp on the 5-inch preview pane can produce halos around high-contrast edges when projected or viewed full-screen. Beginners tend to crank Sharpen because the slider invites it. A good rule of thumb: set the slider where you think it looks right, then back it off by 5 points before the final export. You can always add a subtle sharpen in the editor; removing an AI-baked halo is far more work.
Neglecting the output codec choice is another trap. The default container and codec may not match what your editor expects. For Final Cut Pro or Resolve, ProRes 422 or 422 HQ preserves the bit depth the model works in. H.264 exports re-compress the result and can reintroduce the very artefacts you just removed. Checking the output settings before hitting Start Processing saves an entire re-render later.
Finally, some beginners hunting a topaz video ai 7 full experience on older Macs skip the system compatibility check and run the app on macOS 10.15, where the Neural Engine frameworks are absent. The app launches but falls back to CPU-only inference, turning a 10-minute render into a 3-hour slog. Version 1.7.1 expects macOS 11 or newer for a reason — the Core ML stack on Big Sur and later is what routes work to the Neural Engine efficiently.
A topaz studio torrent search sometimes leads people to mixed bundles that include the still-image app alongside Video AI. Installing both from the same source can create library conflicts if the versions of the shared Topaz framework differ. If you only need video enhancement, installing just the Video AI package keeps the dependency tree clean.