Aspecten
 Download (105 MB)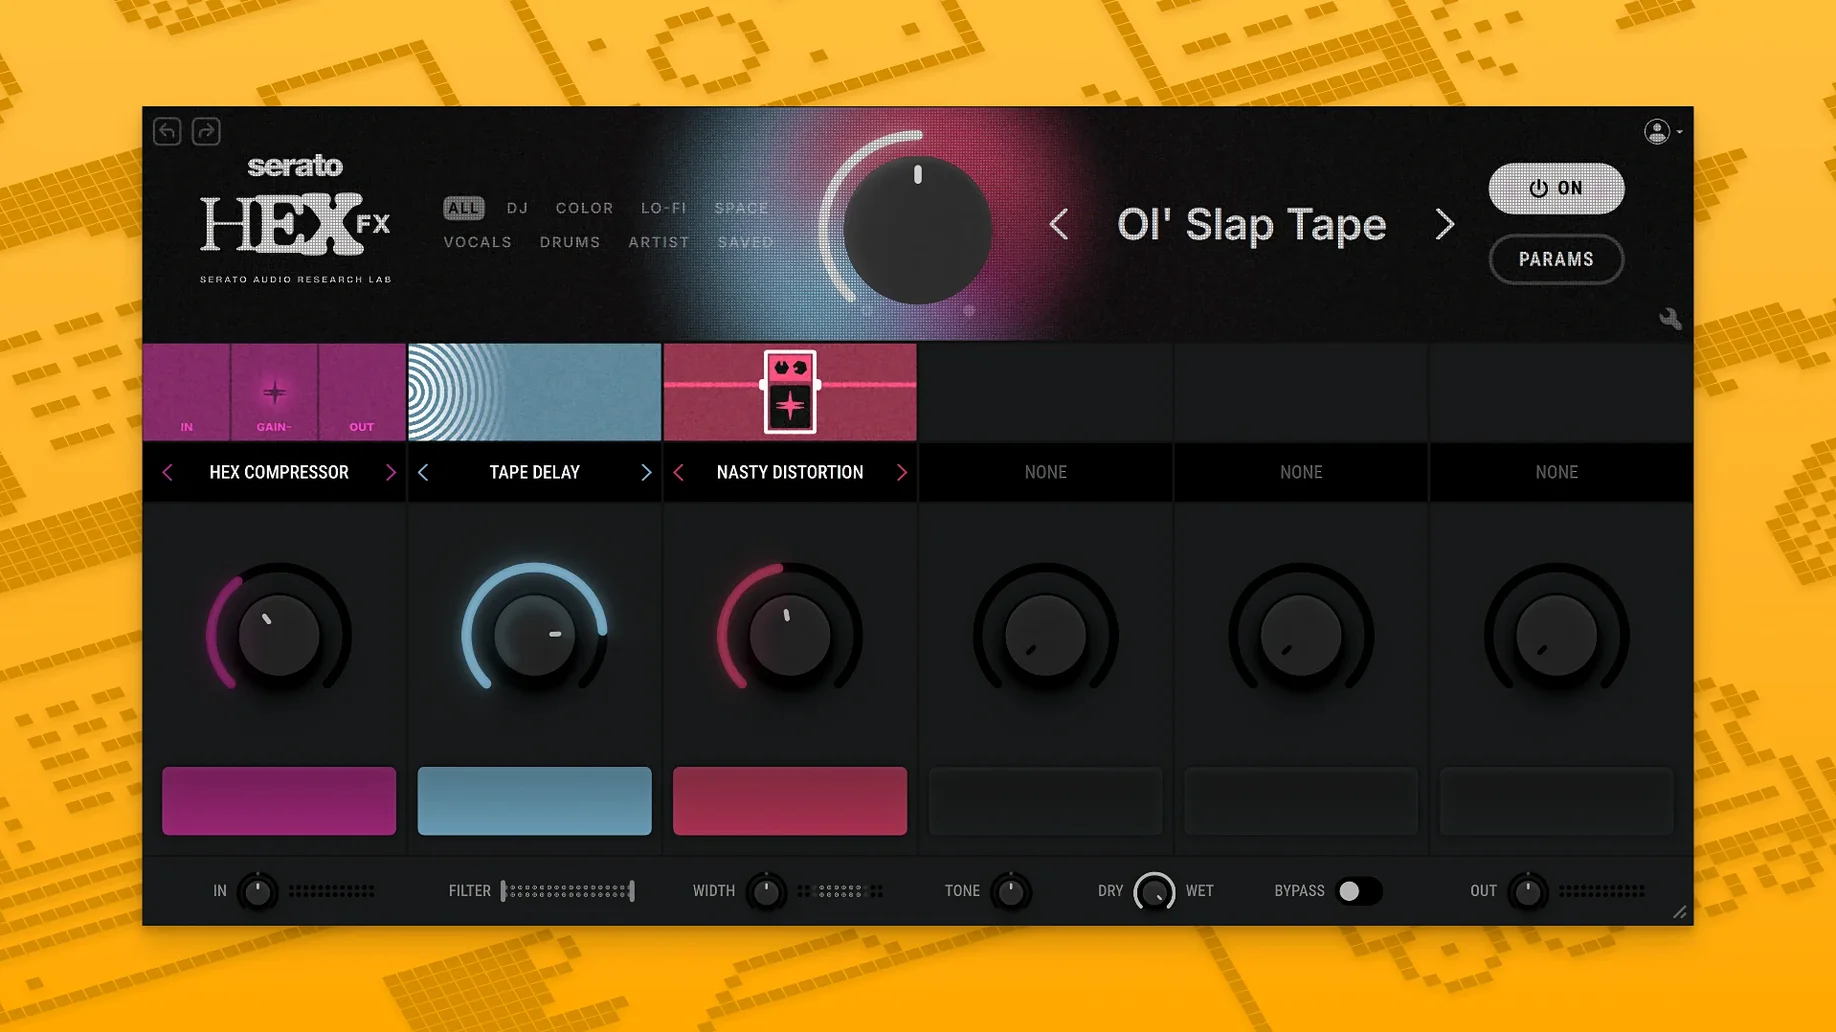
You drop a beat into Ableton Live, the drums tidy but too polite. On the channel strip sits Hex FX, a single multi-effect slot with a chain of treatments waiting. You reach for the central XY pad and push the dot a little to the right. The snare suddenly breathes in slow motion, then snaps back when you let go. That one physical gesture—moving a point across a square—tells you most of what you need to know about how this plugin thinks.
- The XY pad drives two effects at once. Assign reverb to the X axis and a filter to Y, and a diagonal sweep washes the signal outward while opening the high end.
- Performance macros Halftime and Rollout sit under the pad. Halftime drops pitch and tempo by half in one press; Rollout applies a tape-stop deceleration that lands exactly on the beat when released.
- Six effect slots run in series—distortion, modulation, delay, reverb, filtering, and dynamics. Each slot has a single key parameter mapped to the pad, keeping the surface uncluttered.
- Depth sliders per effect let you set a ceiling for how far the macro reaches. A small reverb depth keeps the tail subtle even when the XY dot is pushed to its corner.
- Output routing includes a wet/dry mix and a master limiter, so aggressive moves inside the chain do not clip the channel.
The control layout makes it equally useful for studio automation and live tweaking, since every modulation springs from one pad rather than a row of disconnected knobs. In a live set you can jam the XY position via mouse or touchpad and record the result as automation; in a mix session you draw gentle curves that nudge a synth line between verse and chorus without ever opening a sub-menu.
A typical session with Hex FX starts with something small. Load a drum loop onto an audio track, insert Hex FX in the first slot, and open the interface. The XY pad sits dead centre, the dot at rest. Pick a preset from the factory list—maybe Crunchy Parallel or Wash Out—and listen once without touching anything. Then place two fingers on the trackpad and nudge the dot upward. The loop widens and grit enters the highs. Slide diagonally and a filter closes while the reverb tail stretches. From that moment the session becomes about movement rather than static sound design. You record a pass where the XY position follows the intensity of the loop: tight and dry on the verses, pushed outward on the fills. Automation lanes appear in the DAW, ready to be thinned or smoothed. Later you open the effect chain, swap the distortion slot from Tube to Bit, adjust the depth sliders so the filter never fully closes, and save the result as a custom preset. The whole process—explore, record, tweak, save—takes less than four minutes.
When Logic Pro refuses to scan the AU component
A few behaviours trip people up in the first few sessions. Knowing them ahead of time saves a restart.
- Plugin scan fails in Logic Pro. After installing, Logic may not recognise the AU component immediately. Run
killall -9 AudioComponentRegistrarin Terminal and relaunch Logic. The rescan usually picks it up within seconds. - AAX version not appearing in Pro Tools. Version 1.2.0 added an AAX installer option, but the checkbox is easy to miss. Re-run the installer, select Customise, and make sure the AAX format is ticked. The component lands in
/Library/Application Support/Avid/Audio/Plug-Ins. - High CPU on large effect chains. Six slots with heavy convolution or oversampled distortion can spike a single core. Bounce the processed section to audio rather than running Hex FX live across dozens of tracks. The depth sliders also help: reducing the depth of an unused slot lightens the DSP load because the internal processing scales with the macro range.
- Rollout timing drifts without host sync. Rollout relies on the DAW transport. In a free-running Jam mode or a loosely clocked setup, the tape-stop may not land cleanly. Enable host sync in your DAW's plugin settings for Hex FX, or trigger Rollout only when the transport is running.
- Preset folder not writable. Some users on macOS 10.15 find the default user-preset path locked. Create a folder manually at
~/Documents/Serato/Hex FX/Presetsand the plugin writes to it without complaint.
Limit your first session to two slots and map vibrato to X
The plugin rewards restraint in the first few hours. Rather than stacking six effects immediately, try working with just two slots—modulation into delay, for instance—and learn how the XY pad distributes tension between them. Assign vibrato to the X axis and ping-pong delay feedback to Y. Small diagonal movements produce a warble that stays rhythmic; a sudden shove to the corner throws the delay into self-oscillation while the pitch wobbles wildly. That interplay becomes intuitive after about twenty minutes of deliberate play.
Another early habit worth forming: save a Flat Start preset with all six slots bypassed and the XY pad centred. Use it as a blank slate so you never inherit someone else's gain staging. The master limiter is on by default in many factory presets—fine for protection, but if you want to shape dynamics later in the chain, switch it off and watch the output level.
If you grabbed the 010 hex editor download from a trusted source around the same time, resist the urge to poke at Hex FX's preference files. The plugin stores its state cleanly inside DAW sessions and a single XML file in Application Support. Editing that directly can break preset recall.
Workflow: thickening a thin synth line
- Load a soft synth track—something mid-range, like a pluck or a square lead—and insert Hex FX as the first insert effect.
- Select the Wide & Warm preset as a starting point. It loads a short reverb, subtle chorus, and a low-shelf EQ boost with the XY dot centred.
- Assign the X axis to chorus depth and the Y axis to reverb decay. Pull the dot halfway up and a quarter to the right. The synth immediately gains stereo spread without sounding washed out.
- Open the effect chain. In the dynamics slot, add gentle compression with a 2:1 ratio and a slow release—just enough to glue the chorus movement to the dry signal.
- In the filter slot, switch the default low-pass to the parametric mid-bell and cut 3 dB around 400 Hz. This clears space for a kick drum that sits below the synth.
- Dial the reverb depth slider to 40%. Now even when the XY dot hits the top edge, the tail never overwhelms the transients. Push the dot to the corner during a breakdown, then snap it back for the drop—the contrast between wide ambience and tight focus becomes a structural tool rather than a happy accident.
- Save the result as a user preset named Thick Pluck. Drop it onto similar tracks across the project for a consistent spatial signature, adjusting the XY offset per track to vary the wetness.
This same approach works just as well for vocals, rimshots, or a thin sample lifted from an old record. The XY pad becomes a performance instrument, not merely a mix control, and the chain stays tidy enough to recall six months later without scratching your head. If you came across a serato hex fx free download while building out your plugin folder, the preset system alone justifies spending time with it—once you have a handful of your own chains saved, Hex FX starts to feel less like a collection of effects and more like a single instrument with a hundred voices.