Aspecten
 Download (72 MB)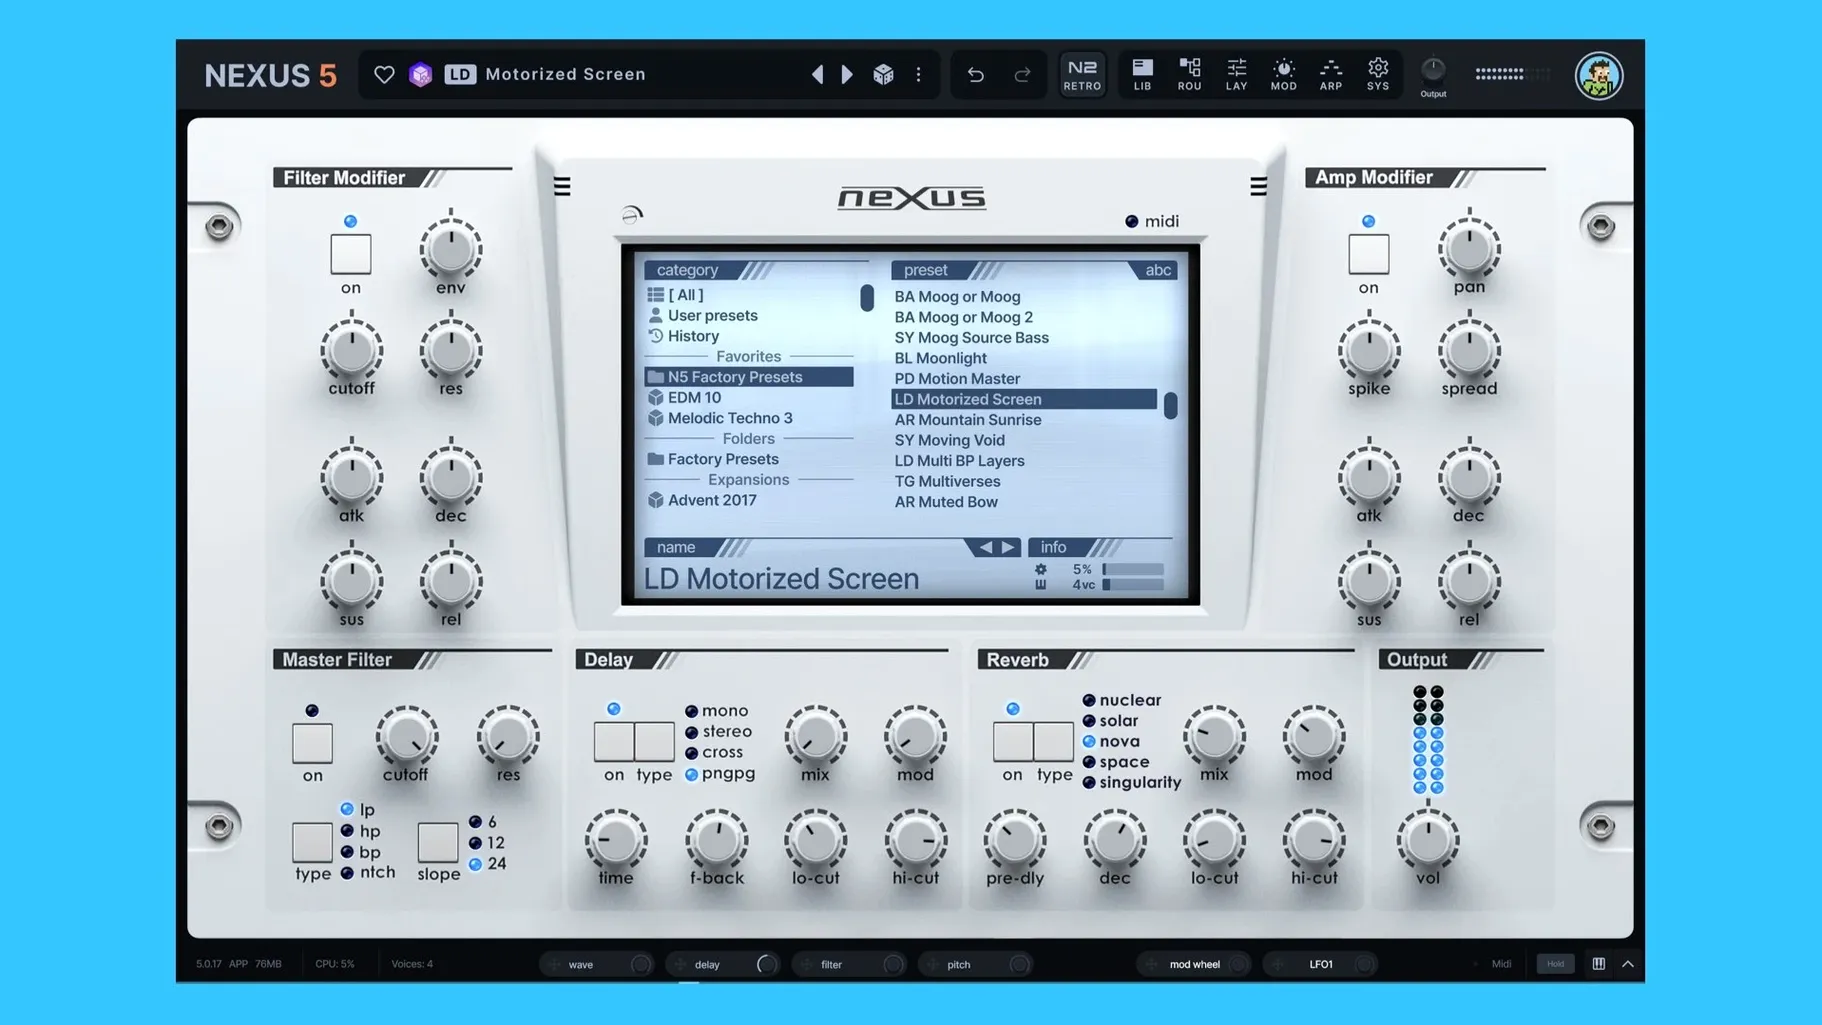
The new Clipper effect changes how transients sit in a busy arrangement. It is one of several additions in version 5.5.12 that push NEXUS beyond a traditional preset player and into deeper sound-design territory.
At its core, NEXUS combines audio samples with virtual analog, wavetable, granular, and frequency-modulation oscillators. Layering a multisample piano with a phase-modulated sine wave, then routing both through the unison overhaul with up to 16 voices, produces textures that read as hybrid rather than purely sample-based. The modulation system now reaches oscillator phase minimum and maximum, which lets a slow LFO tilt the stereo field without touching pan controls.
The keyzone-triggered Ducker is built for kick–bass separation. Assign a keyzone range and the effect ducks the low end only when those notes play, leaving the rest of the preset untouched.
Import your own samples for hybrid layered presets
- Building custom presets from imported samples, multisamples, and sample packs
- Hybrid patches that layer samples with granular or FM oscillator engines
- Quick mix shaping via the built-in effects section and the new Clipper
- Creating and managing custom expansions through reFX Cloud
Fixed layout limits interface customization
- A skin editor is available, but the interface still follows a fixed control layout
- Unison at 16 voices increases CPU load noticeably on larger projects
Open the oscillator section instead of just browsing presets
A fresh install of NEXUS can lead a producer into a few predictable traps. The most common is treating it as a simple preset browser and never opening the oscillator section. Scrolling through expansion libraries and stopping at the first usable sound is fine for speed, but ignoring the layer mixer leaves most of the instrument untouched. A second mistake is stacking unison at 16 voices on every patch without checking the phase relationships. Wide supersaw-style presets sound impressive in isolation; in a dense arrangement they swallow the stereo field and force the kick into a narrow corridor.
Another early habit is neglecting the modulation depth rings. Version 5.5.12 tracks active modulation sources in the rings and tooltips, which means a quick glance shows whether an LFO is actually reaching its destination. Beginners often assign a modulator and forget to set the depth, then wonder why the sound stays static. The BPM readout on the SYS page also gets overlooked. When a preset preview does not match the project tempo, the BPM override option is the first place to check, not the arp pattern or the delay time.
Loading custom samples without setting root-note and loop markers properly is a subtler misstep. NEXUS lets you slice, crossfade, and loop audio files, but an unmarked multisample across the keyzone results in pitched artefacts in the lower octaves. Spending five minutes inside the sample editor before saving a user preset avoids this entirely.
Fast preset switching on Apple Silicon
On a modern Apple Silicon Mac, NEXUS loads quickly and switches presets with minimal lag. Browsing expansions stored on an internal SSD feels snappy; the preview system adjusts to host tempo, so auditioning sounds in context is immediate. Stability under macOS 10.15 and later is solid. During long sessions with multiple instances, crashes are rare and usually traceable to a specific third-party expansion rather than the plugin core.
Resource use scales with patch complexity. A single layer running a short loop and a light reverb sits below two percent CPU on an M-series processor. Layering four oscillators with 16-voice unison, a granular engine, and the new Clipper pushes that figure closer to twelve or fifteen percent per instance. Producers working on hundred-track projects learn to bounce such patches to audio early. The trade-off is reasonable: the unison overhaul sounds thick and phase-coherent, but it is not a lightweight effect. Memory usage climbs with large multisample libraries, though the streaming engine handles disk access without audible glitches.
One practical observation: the Clipper effect, while CPU-friendly on its own, interacts with unison voice count. Clipping a 16-voice supersaw can introduce intermodulation products that sound harsh if the input gain is pushed too hard. Backing off the drive by two or three decibels usually cleans it up without losing perceived loudness.
Customize the skin editor first for easier editing
Start by disabling the default skin and opening the new skin editor for ten minutes. A darker interface or a reduced-contrast colour scheme makes long editing sessions easier on the eyes, and the act of customising the panel forces you to scan every control section. Next, load a simple sine wave in one oscillator, route a slow triangle LFO to oscillator phase minimum, and listen on headphones. Hearing the stereo image shift without touching a pan knob teaches the modulation routing faster than reading the manual.
Build a small user library on day one. Import five drum one-shots, set their loop points, save them as a custom expansion via reFX Cloud. The process of slicing and keyzone-mapping a handful of samples reveals how NEXUS handles file management, and the resulting kit becomes a quick reference patch for later projects. Also worth doing early: assign the Ducker keyzone to a MIDI note outside your typical kick range and test it with a held bass patch. The keyzone trigger is easy to set, but getting the release time right takes trial and error. A setting between 80 and 140 milliseconds usually keeps the tail smooth without masking the transient of the next kick hit.
If you acquired the plugin through a reFX Nexus torrent or searched for reFX Nexus Mac torrent to try it before committing, take the time to verify the installation against the VR.nfo instructions included in the package. A clean setup avoids missing presets and library path errors that can otherwise waste an afternoon.
Fill a hollow low end with a deep sub patch
A producer opens a project at 128 BPM with a sketch arrangement of drums and a bassline. The low end feels hollow, so they insert NEXUS on a new instrument track and call up a deep sub patch from a recent expansion. The preview matches the host tempo immediately because the BPM readout on the SYS page is synced to the DAW.
They scroll through three variations, settle on a clean sine layer, and open the modulation section. A short decay envelope is routed to oscillator phase minimum, just to nudge the stereo width on the attack transient. The depth ring confirms the modulation is active. The bass now sits tighter against the kick without extra processing.
With the low end in place, a second NEXUS instance is added for a pad. The producer drags a multisample string swell into layer A, then adds a wavetable oscillator in layer B tuned an octave higher. Unison is set to eight voices with slight detune. The new Clipper is inserted at the end of the effects chain with drive at thirty percent, shaving the peaks so the pad tucks under a vocal phrase. The keyzone Ducker on the bass instance is assigned to C1–B1, keeping the sub out of the way when the kick hits.
Twenty minutes later the arrangement needs a transitional rise. The producer loads a noise-based effect preset, opens the arp page, and copies the arp pattern into the sequencer as a starting point. A quick adjustment of the gate length and a BPM override of 64 creates a half-time sweep that builds into the chorus. Both instances are frozen to free CPU resources, and the session continues with sixteen tracks still running smoothly.