Aspecten
 Download (545 MB)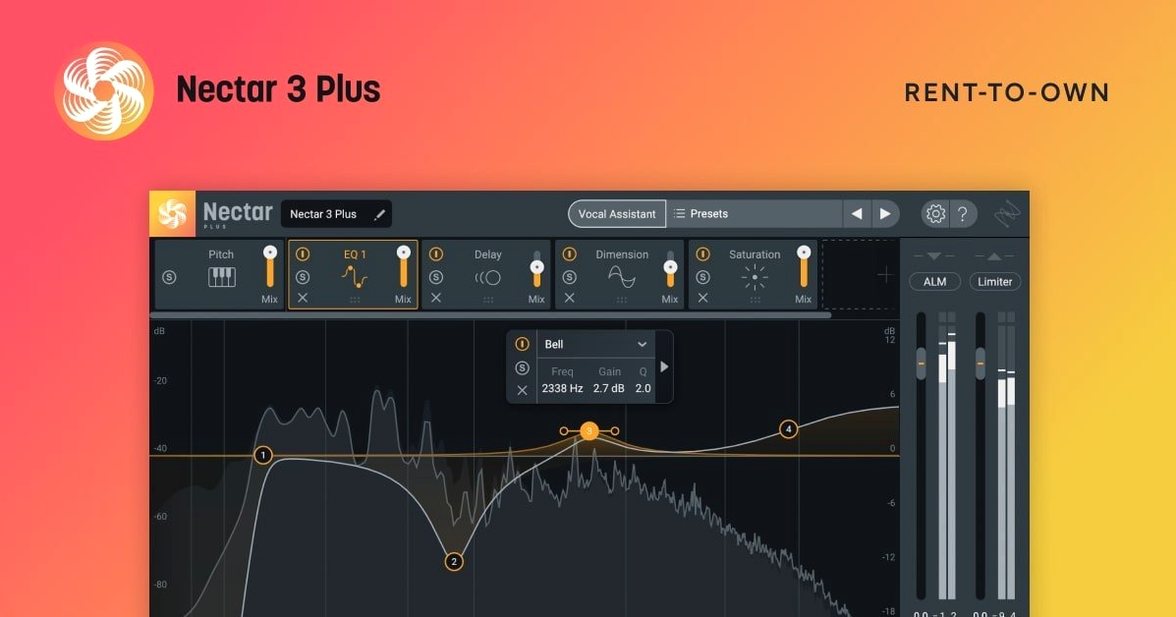
Version 4.1.0 requires macOS Ventura 13.7.4, a jump from the earlier Catalina floor. The plugin operates as a 64-bit suite spread across Elements, Standard, and Advanced tiers, with the upper editions unlocking Voices for layered harmony and background vocal generation.
At the centre sits the Vocal Assistant. It listens to a short sample and suggests a starting chain — compression, EQ, de-essing — shaped to the voice it hears. You can accept the suggestion as a base or adjust each module yourself. The assistant does not lock you out; every parameter remains open for manual tweaking.
Vocal Assistant shapes compression and tone before you tweak
- Producers who want a starting point from the Vocal Assistant before fine-tuning compression, tone, and width by hand
- Sessions where breath noise removal and loudness levelling need to happen inside one plugin instance
- Adding harmony or background vocal layers without recording extra takes, when using Standard or Advanced editions
Elements edition drops Voices and key processing blocks
- The module set differs between editions: Voices and certain processing blocks are absent from Elements
- Version 4.1.0 tightened the macOS requirement to Ventura 13.7.4, leaving older systems behind
Mixing a lead vocal, start to finish
A vocal chain in Nectar often begins with a raw, untreated recording of a verse. Insert the plugin on the vocal track and let the Vocal Assistant listen to a few seconds of the performance — a phrase with a natural range of dynamics works best. The assistant returns a chain of modules tailored to what it detects: spectral shape, sibilance, uneven levels.
Accept the suggestion as a rough scaffold. First, open the EQ module. The assistant typically applies a high-pass filter around 80 Hz and a gentle presence lift near 5 kHz; nudging the gain and frequency points by ear against the mix is where the vocal starts to sit. Next, move to Compression. The suggested threshold and ratio often need a slight relax — backing off the ratio from 4:1 to 3:1 and raising the threshold by a decibel or two preserves the singer's phrasing while keeping peaks under control. The De-esser is usually close to correct, though widening the band or lowering the threshold a touch stops it from clamping down on intentional breathiness.
If the edition includes Auto-Level, engage it early. It writes gain automation internally, smoothing out volume dips before they hit the compressor. This lets the compressor work less and sound more transparent. After that, add Voices for a doubled unison layer, blended low enough to thicken without sounding like a separate take. Pan the double slightly left and the original centre for a sense of spread. Finally, feed a touch of the Dimension module for stereo width on the top end, keeping the low midrange mono to hold the vocal steady in the centre of the mix.
Full chain loads instantly on Apple Silicon
On an Apple Silicon Mac, Nectar loads its full chain without perceptible lag. The plugin appears in the DAW browser within a few seconds of scanning, and the interface draws cleanly even at non-standard display scaling. The Vocal Assistant completes its analysis of a ten-second sample in roughly three to four seconds — fast enough to audition on different sections of a track without losing flow. Module switching is immediate; there is no stutter when toggling between the EQ, compressor, and De-esser views while audio plays.
CPU load depends on the modules active. A chain of EQ, two compressors, De-esser and a light reverb hovers around four to six percent on a recent M-series processor at a 128-sample buffer. Engaging Voices with three harmony parts pushes that closer to nine or ten percent. Auto-Level adds a small, constant overhead because it analyses loudness in real time. On Intel machines the figures roughly double, though still well within the bounds of a session with twenty-odd tracks. Memory use stays modest — the plugin rarely claims more than 180 MB of RAM even with the full module set loaded.
Dialogue bus rescues untreated room audio with one insert
Consider someone cutting a weekly interview podcast, working with dialogue recorded in an untreated room. The raw file arrives with uneven loudness, occasional breath bumps and a low-end rumble from a stand-mounted mic. Nectar sits on the dialogue bus, not a musical vocal track. The Vocal Assistant analyses a short speech segment — no singing, just a voice explaining a topic — and builds a chain that leans harder on the compressor and De-esser than it would for a sung vocal.
The editor keeps the EQ broad, cutting below 90 Hz to remove the rumble and adding a small, wide boost near 3.5 kHz so the voice cuts through on laptop speakers. The De-esser catches sharp "s" and "t" sounds that become fatiguing over forty minutes. Then Auto-Level handles the volume swings between a quiet guest and an animated host, evening them out before the compressor sees the signal. The episode exports with consistent loudness and no manual clip-gain editing across the timeline. What would have been a tedious hour of drawing automation becomes five minutes of listening and approving the assistant's choices.
Extend Assistant analysis to twelve seconds for a representative snapshot
A few changes right after installation make the plugin feel more predictable. In the global settings, set the analysis length for the Vocal Assistant to the longest available — twelve seconds or more — so it captures a representative sample of dynamics and tone. The default shorter length can overfit to a quiet phrase and under-compensate for louder sections.
Inside the EQ module, switch the analyser to post-processing view. The default often shows the input spectrum; seeing the output instead gives a clearer picture of what the EQ is actually doing to the signal in real time. For the Compressor, disable auto-makeup gain at first. Manual makeup gain forces you to match levels by ear, which avoids the common pitfall of perceiving "louder" as "better" when comparing the processed and dry signal.
If your edition includes Voices, reduce the default humanisation and pitch variation slightly. The factory settings can sound too loose on tight pop arrangements. A humanisation value around 25 percent keeps the double tight without turning robotic. For Backer, set the high-pass on the generated layers at 150 Hz to prevent low-mid clutter when stacking multiple vocal parts behind a lead.