Aspecten
 Download (715 MB)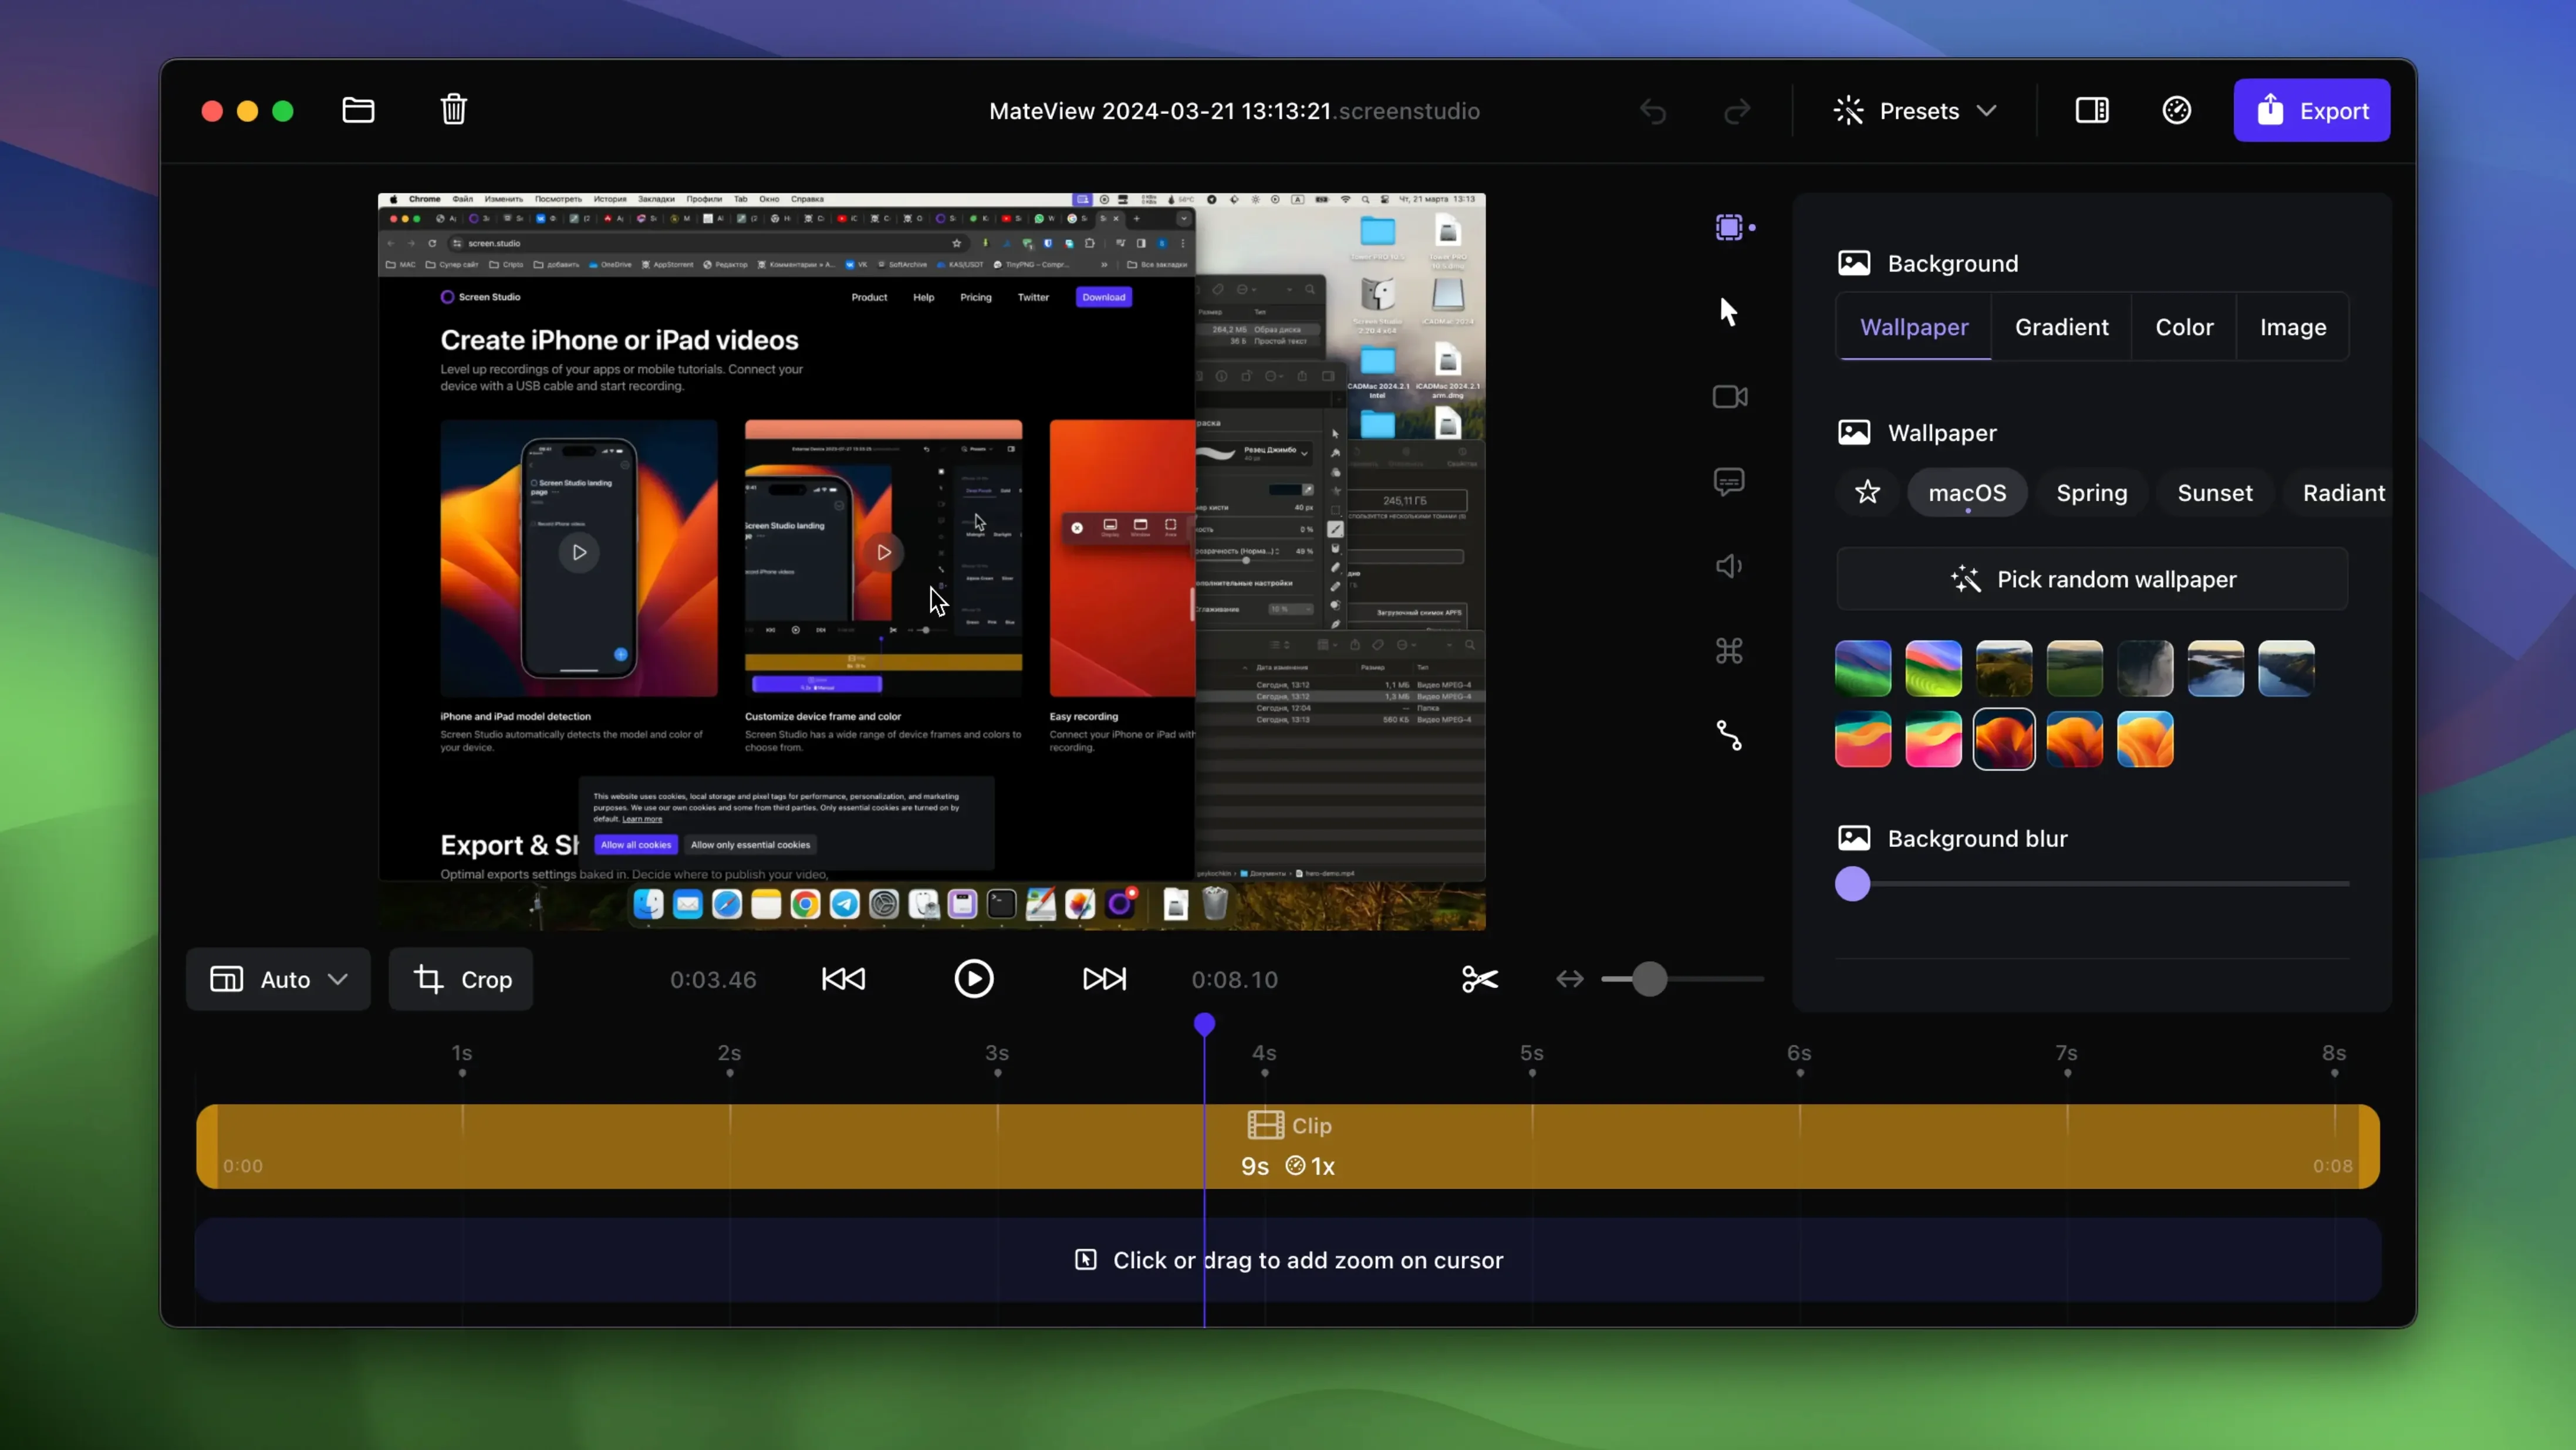
Screen Studio is a native macOS screen recorder that layers automatic motion onto a timeline you can refine by hand.
Adjusting zoom after recording
The automatic zoom can be reworked. Each zoom keyframe is editable — you drag its start and end points, resize the crop area, or delete a motion you do not need. Manual zoom selection during editing gives you frame-level say over what the viewer sees.
Controlling the cursor in the final video
Cursor looping returns the pointer to its starting position near the end of the clip, so a demonstration loops cleanly without a jarring jump. The size, shadow, and padding around the cursor can also be set, along with an on-screen display of keyboard shortcuts pressed during the recording.
Exporting for the right format
The app can export vertically and adjusts scaling automatically for that shape. GIF export is built in, and cropping, cutting, and speed changes are handled on a single timeline. Background colour and spacing around the captured area are adjustable before you write the file.
Mistakes beginners make straight after installing
Most early frustrations come down to three things.
The first is recording at too large a resolution without thinking about the final delivery. A full 5K desktop captured at 1× scaling looks crisp on your machine, but the automatic zooms can feel shallow because there is so much canvas to crop into. Recording at a smaller display resolution, or using the “Retina 1×” setting deliberately, often gives tighter results with less manual correction.
The second mistake is treating the zoom keyframes as fixed. New users tend to delete and re-record when a zoom snaps to the wrong spot at the wrong moment. Dragging a keyframe’s bounds in the timeline takes a few seconds and is worth learning on day one — it saves far more time than restarting a take.
The third is ignoring the audio pipeline. Leaving the microphone set to “System default” while recording a demo can pull in notification pings and alert sounds. Telling Screen Studio to grab system audio only from the app you are demonstrating avoids that entirely. The setting is tucked inside the audio source picker and is easy to miss during the first session.
Checking a box to hide desktop icons before recording
- Desktop icon hiding. A checkbox in the recording panel hides all desktop icons while the capture is running. Clutter-free footage without needing a separate clean-user account or a manual tidy beforehand.
- Shareable links. Right-click any finished recording in the library and choose “Copy shareable link.” Screen Studio uploads the video and puts a direct URL on your clipboard. Useful for quick client reviews when a full export would be overkill.
- Clipboard export. The “Copy to clipboard” option writes an H.264 movie straight to the pasteboard. Paste it into Slack, a Notion page, or a Mail message without ever touching Finder.
- Device recording detection. Connect an iPhone or iPad over USB and Screen Studio picks up the model and colour automatically. The device bezel in the recording window matches your hardware without manual setup.
- Cursor auto-hide animation. When the cursor stays still for a few seconds, it fades out smoothly rather than vanishing in a single frame. The behaviour feels deliberate and keeps the viewer focused on the interface.
Saving a default audio profile for consistent sound
Set up a dedicated recording profile in the audio preferences early. Pick your preferred microphone, enable background noise removal, and set voice normalization to taste — then save it as the default. Subsequent recordings will sound consistent without you needing to check levels each time.
Spend ten minutes making short test clips with different amounts of manual zoom correction. A tight zoom that follows every click works for a product walkthrough; a looser, slower zoom suits a design review where the viewer needs to see layout context. Knowing which style fits which job means you reach for the right slider position from the second session onward.
If you plan to export vertically for social media, do a quick vertical–horizontal comparison on a 30-second clip before you commit to a full-length recording. The automatic scaling logic handles resizing well, but text-heavy interfaces can become hard to read at mobile widths. Cropping in a little tighter on the region of interest before the final export often produces a cleaner result than letting the auto-scale do all the work.
Keyboard shortcut display deserves a few minutes of attention. The default overlay shows keys as rounded rectangles near the bottom of the frame. You can toggle it on or off per recording, but you cannot change its position after the fact. If your interface has important controls in the lower third, consider recording shortcuts separately and overlaying them later, or simply turning the display off for that section.
Capturing system audio from a single app
Does it record system audio from specific apps or just everything? Both. The audio source menu lets you capture all system output or pick a single application. If you are recording a browser demo and want to exclude music playing in another window, selecting only the browser keeps the soundtrack clean. The difference is audible on the first playback and saves editing time later.
How does the automatic zoom decide where to focus? It tracks mouse clicks, text input, and window focus changes. The algorithm favours the area around the cursor, but it also recognises when you switch to a different window and adjusts the framing accordingly. It is not perfect — rapid alt-tabbing can confuse it momentarily — but you can correct any misjudgement by dragging the keyframe on the timeline.
Can I record an external device without a capture card? Yes, over USB. Plug in an iPhone or iPad, and Screen Studio sees it as a source. The device screen appears in its own window, complete with a bezel that matches the detected model and colour. Latency is low enough for live app demonstrations, and the recording quality tops out at the device’s native resolution.
What happens to the transcript — is it uploaded somewhere? Transcription runs locally on the Mac. No text leaves the machine, and no network connection is required. The generated transcript appears as an editable text track inside the app, and you can copy it out or leave it embedded for searchability.
Does the zoom motion look natural, or does it feel robotic? The default easing curve mimics a smooth camera move — gradual acceleration, a steady middle, and a soft deceleration. You can adjust the duration and the amount of motion blur per keyframe. At the default settings, the result resembles a well-operated physical camera slider more than a software trick.
Recording 4K for 45 minutes without the CPU spike
Screen Studio is a native app built for Apple Silicon and Intel, and it shows in the way it handles long sessions. Recording a 45-minute walkthrough at 4K resolution with system audio and a webcam overlay keeps the CPU draw modest — a 2021 MacBook Pro with an M1 Pro chip hovers around 20 to 25 percent total utilization during capture, with the encode pipeline handled by the media engine on Apple Silicon machines. The fan stays quiet even on smaller laptops like the M2 MacBook Air.
Export speed depends on the timeline complexity, not just the clip length. A recording with ten manual zoom keyframes, a selfie overlay, and background noise reduction takes longer to render than a flat, uncorrected capture of the same duration. On an M2 Max, a five-minute 4K clip with moderate edits typically exports in under a minute. A long session with many zooms might take two to three minutes. GIF export is noticeably slower — the format’s age shows — but still finishes within a reasonable window for short looping demos.
Memory usage sits around 400 to 600 MB for a typical project. The library stores recordings as references until you export, so disk space grows only when you explicitly save a rendered file. The app has been stable across weeks of daily use; crashes are rare and usually tied to specific edge cases, like connecting an unrecognised USB capture device. Autosave covers you if something does go wrong — reopen the app and your last recording is intact.
One quirk worth knowing: keeping the library pane open while a long export runs can introduce a slight UI stutter on some configurations. Closing the library or minimising the window during export avoids it entirely. It is a minor thing, but it is the sort of detail that matters when you are working to a deadline and every second of smooth operation counts.