Aspecten
 Download (122 MB)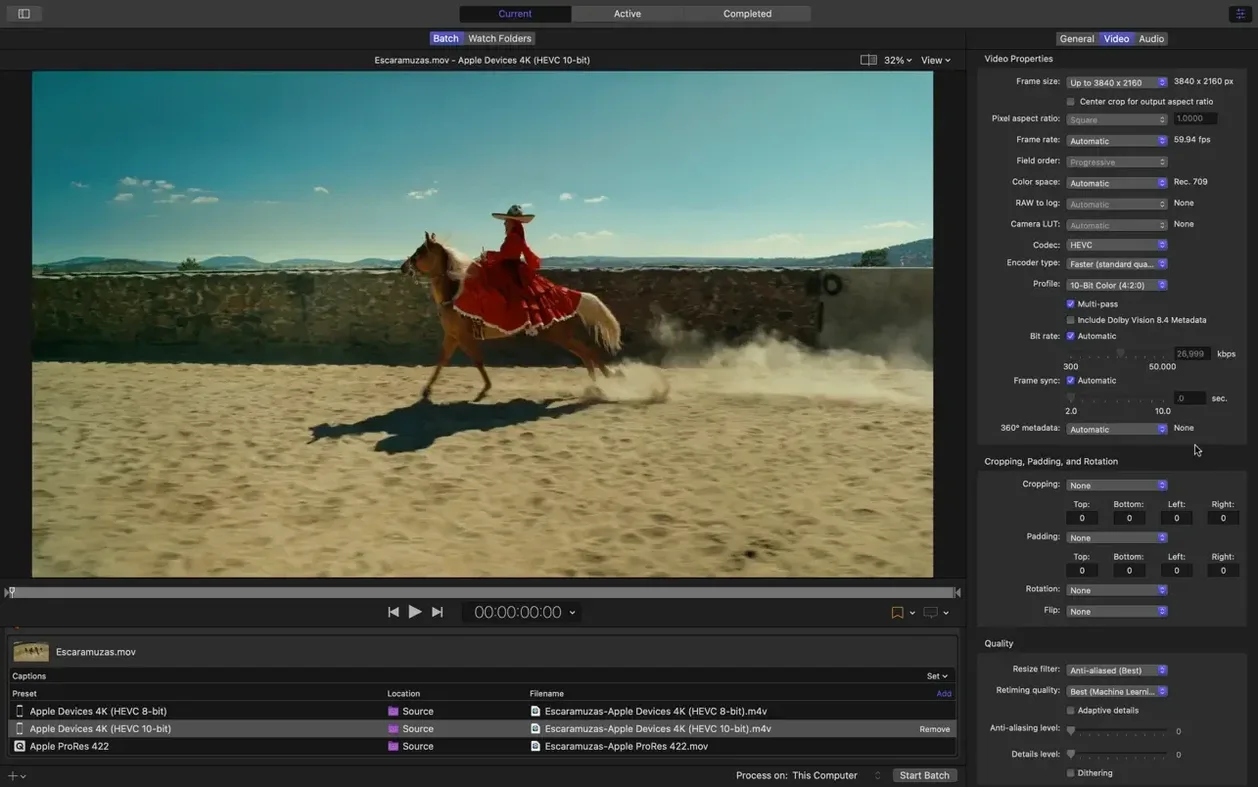
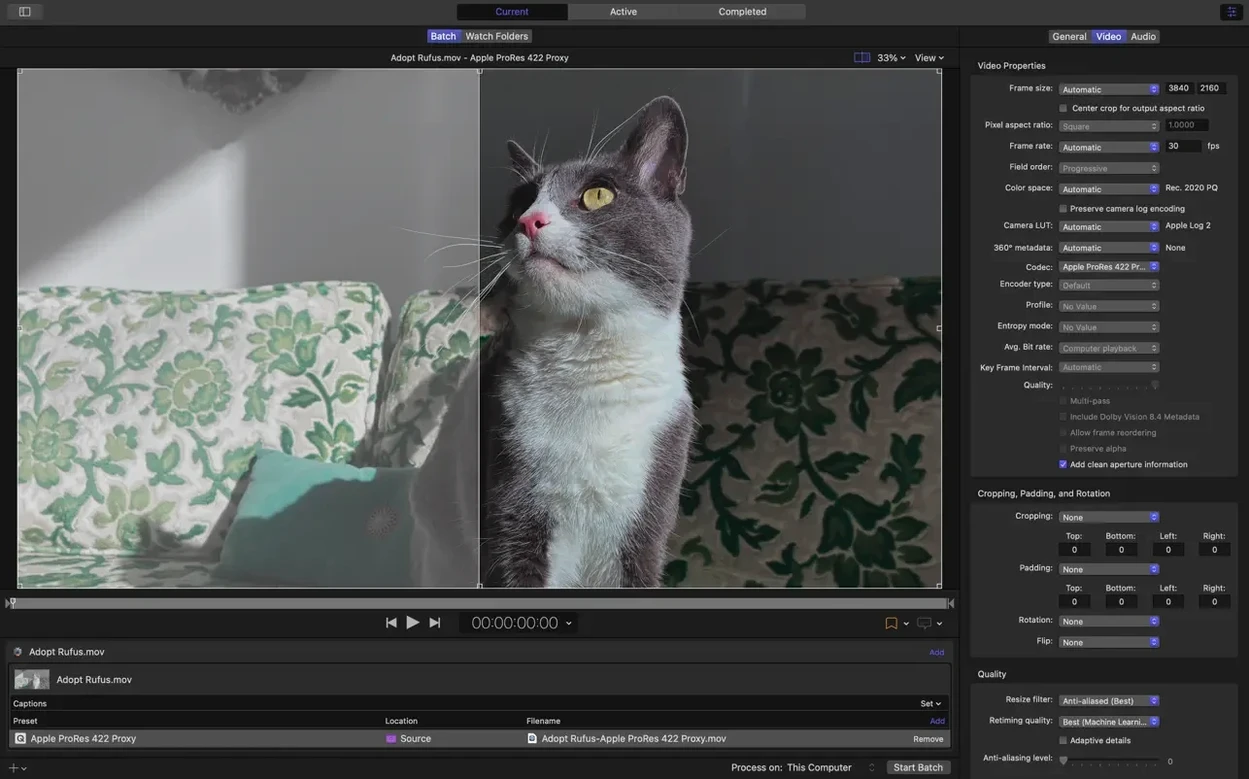
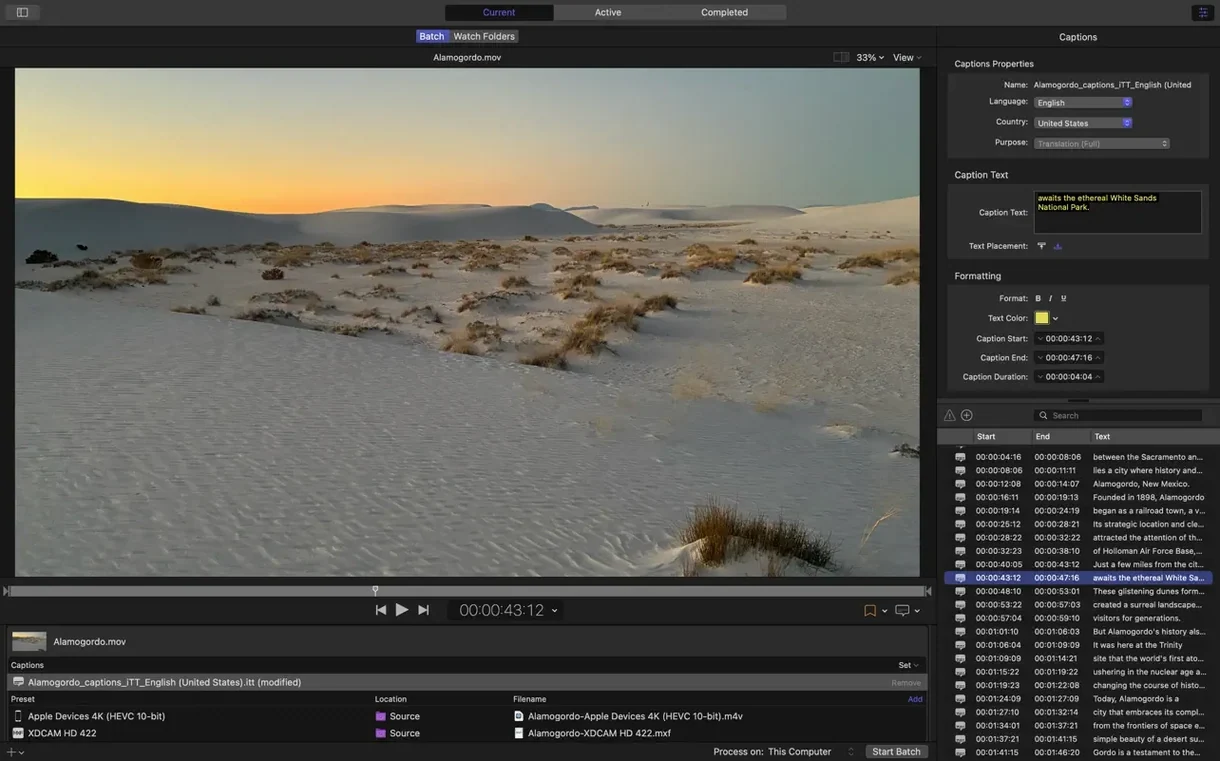
An immersive metadata viewer now sits before the encode. Compressor 5.3 transcode workflows begin well before a file is written, and that preview step is where the current version plants its flag.
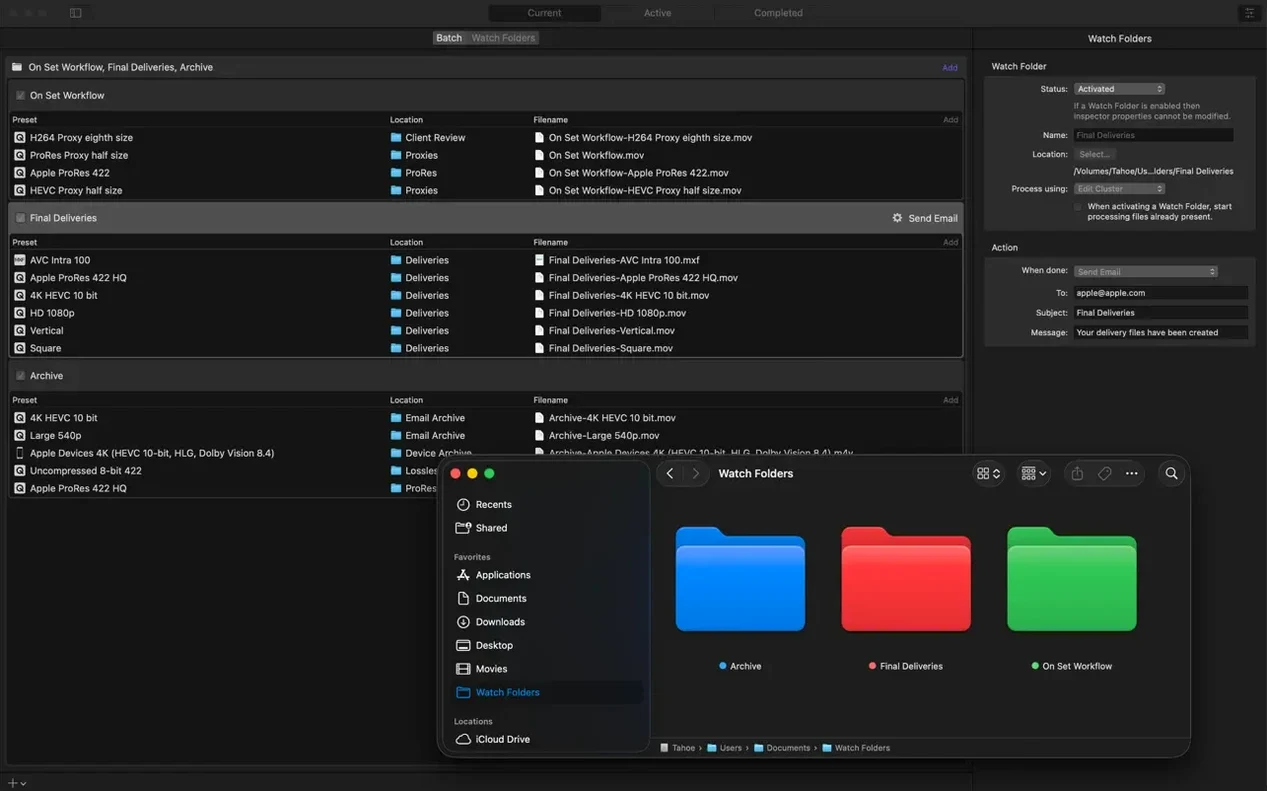
The chain after that is methodical. Step one: import a source — anything from a Final Cut Pro project to a standalone clip. Step two: pick an output setting. The presets cover common device formats and professional codecs, including HDR, HEVC, 360° video, and MXF. You can also build custom settings. Step three: add a post-encode action, like uploading directly to a streaming service. Step four: send the batch to the rendering engine, which is the same one shared with Final Cut Pro and Motion. For larger jobs, distributed encoding shifts work across multiple Macs on the network.
Whether that whole sequence is an option depends on the machine in front of you. Compressor expects macOS 15.6 or later, 8 GB of memory, and 1.2 GB of available disk space. It runs on both Apple silicon and 64-bit Intel Macs. If the operating system is older, the current version simply will not launch.
Run a no-pressure test batch first
Set aside an hour to walk through a small batch with no deadline pressure. Pick three or four short clips in different codecs and run them through a handful of presets. The point is not the output itself — it is learning where the inspector panels live, how the queue behaves when you reorder jobs, and what a failed encode looks like. Knowing the failure modes early saves panic later.
Get comfortable with the share monitor early. It lives in the Window menu and shows which shared computers are available for distributed encoding. Even if you only have one Mac today, checking this panel teaches you what Compressor sees on the network. When a second machine joins later, you already know where to look.
Drag a Final Cut Pro project file directly onto the Compressor window once, just to see what happens. The app opens a small dialog asking which roles or timeline sections to transcode. Many users go months without discovering this shortcut and instead export from Final Cut first, adding an unnecessary generation of rendering.
A colourist’s afternoon with Compressor
A colourist finishing a short film has a 12-minute timeline graded in DaVinci Resolve, but the deliverables list calls for a dozen variants: a ProRes 422 HQ master, an HDR10 HEVC for a client screen, an SDR h.264 for Vimeo, and a stereo pair for a festival that still wants anaglyph previews.
She exports one master file from Resolve and drops it into Compressor. The batch builds quickly. The ProRes and SDR h.264 settings are stock presets — she drags them onto the source and moves on. For the HDR10 output she opens the inspector, confirms the colour space tags, and sets the HEVC data rate limit, a new option on her M3 MacBook Pro. The anaglyph job takes thirty seconds to configure because the 5.3 update added a preview toggle for stereoscopic formats right in the viewer. She ticks one box, checks the red-cyan separation in the preview, and adds the job to the queue.
Four encodes run while she writes the delivery email. The hardware encoder on the Apple silicon chip chews through the h.264 and HEVC jobs fast. The ProRes encode is slower, bound by the storage write speed. No job stalls. When the batch finishes, the post-encode action copies all deliverables to a dated folder on the client drive, and she has the afternoon back.
Set a default output folder immediately
Compressor ships with sensible defaults, but a few early tweaks pay off. Open the Preferences window before building your first serious batch.
- Default destination for output files. By default, Compressor places encodes next to the source. Changing this to a dedicated output folder — perhaps on a fast external drive — stops your source directories filling up with delivery files.
- Post-encode action behaviour. If you routinely copy finished files to a server or a client folder, set a default action rather than adding it manually to every job. The time saved accumulates quietly.
- Queue start behaviour. The preference that controls whether the queue begins processing immediately or waits for your manual click is worth adjusting to match your working style. If you tend to build a large batch over an hour, switch it to manual start.
- Shared computer naming. Under the Shared Computers tab, give your Mac a recognisable name. “Mac Studio (Render)” is more useful on a busy network than “John’s Mac.”
Open the inspector before every batch
The most common early error is ignoring the inspector entirely. A preset is a starting point, not a finished recipe. Frame rate, colour space, and audio channel mapping often need adjustment for the specific source. Clicking “Start Batch” without opening the inspector at least once leads to outputs with wrong levels, missing audio tracks, or unintended letterboxing.
Another frequent misstep is confusing a Compressor preset with a Final Cut Pro export setting. The two share language but not behaviour. Compressor presets can carry post-encode actions and distributed encoding logic that Final Cut’s share menu ignores. If you need those features, export a project file rather than using the share destination.
Beginners also tend to queue too much at once. A batch of forty encodes looks efficient on paper, but if the first two reveal a settings mistake, the remaining thirty-eight are wasted processing time. Start with a representative sample job, verify the output, then duplicate and adjust for the rest.
Hardware encoding leaves the CPU nearly idle
The rendering engine is exactly what Final Cut Pro and Motion use, and the maturity shows. Encoding feels predictable: an h.264 transcode on Apple silicon uses the hardware encoder and barely touches the CPU cores, while a software-based ProRes encode scales across all available cores without over-subscribing them. Memory pressure stays moderate even with 4K sources — the app appears to stream rather than fully buffer large frames.
Stability under 5.3 is uneventful, which is the best kind. Over a week of daily batches mixing HEVC, ProRes, and MXF outputs, the app did not crash once. A queue pause and resume mid-batch worked cleanly. The one quirk observed: when distributed encoding is active and a remote Mac drops off the network, the current job fails but the rest of the batch continues without hanging — better behaviour than some earlier versions managed.
Background resource use when idle is near zero. The app sits quietly in the Dock, consuming no measurable CPU. During an encode, the thermal profile on a MacBook Pro stays surprisingly flat for hardware-accelerated codecs, though a sustained ProRes 4444 batch will spin the fans eventually. For most users working with h.264, HEVC, and standard ProRes flavours, the machine remains cool and responsive enough for other light work alongside the encode queue.