Aspecten
 Download (35 MB)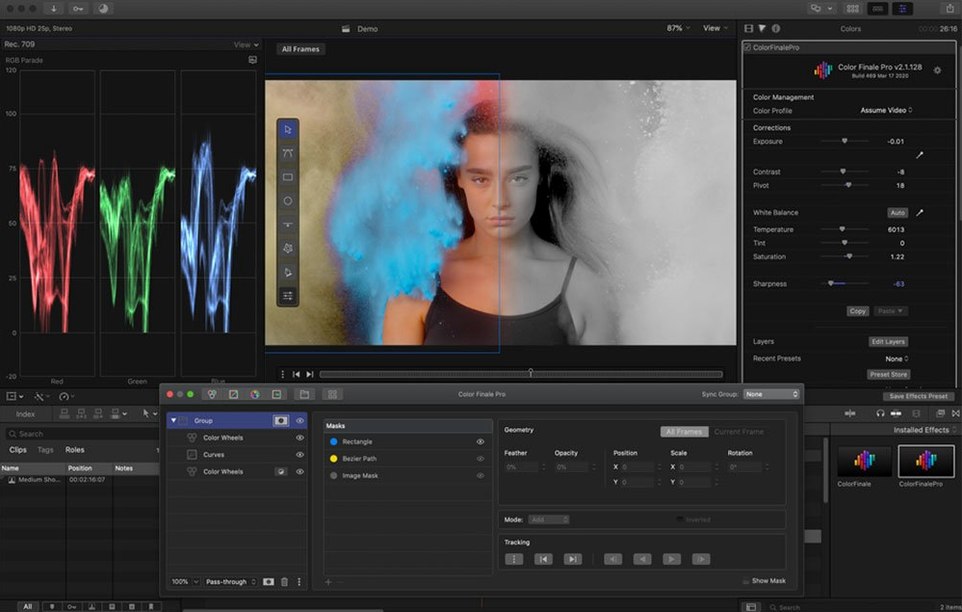
Final Cut Pro’s built-in colour tools cover the basics well, but a grading session that moves beyond a single correction layer can quickly hit a wall. There is no native way to organise secondaries into a clean node-style flow, nor any built-in track-based grading system. That is the gap Color Finale 2 steps into, bringing a layer-based approach directly into the timeline.
Tracks and buses in practice
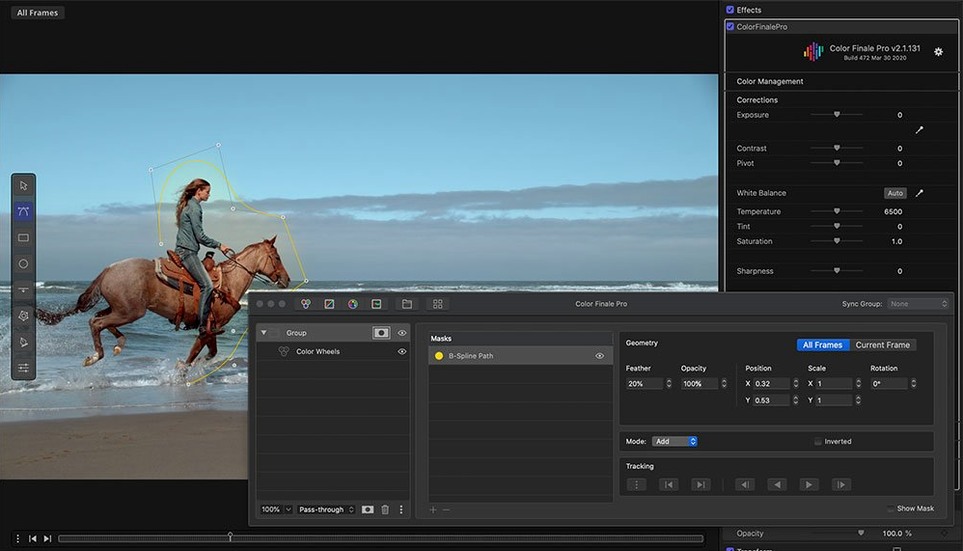
At the centre of the plugin is a track system that will feel familiar to anyone who has worked in a dedicated grading application. Corrections stack in layers, each with its own blend mode and opacity. A bus architecture lets you route masks and keys between layers, so a luma key isolating a window can drive a subsequent curve adjustment on a separate track. The HSL Curves tool lives alongside primary colour vectors, giving you precise control over hue-specific saturation and luminance shifts without leaving the panel. For finishing, you can author and save LUTs and presets directly from the plugin, which keeps look development self-contained inside Final Cut Pro.
Applied at the end of an edit on a clip or adjustment layer
Color Finale 2 tends to sit at the end of an edit, applied as an effect to a clip or adjustment layer. A bonus workflow for recreating looks ships with the package, along with the LUT Utility for managing external transforms. The included Color Preset Store offers a starting point, though much of the value comes from building a personal library. The current 2.x version requires Final Cut Pro 10.7 or newer and runs on Intel and Apple silicon Macs. It is a 64-bit x86 build, and a separate application is needed to operate within the macOS framework. While the track-and-bus design adds real flexibility, the need for that companion app means the plugin is not as self-contained as a purely effect-based tool would be.
Grading a documentary interview under a deadline
A documentary editor sitting with forty minutes of interview footage across two cameras has perhaps an afternoon to get the grade consistent and the skin tones sitting right. The built-in board in Final Cut Pro can balance a single clip, but matching across angles and pushing a subtle teal-and-warm split tone usually means juggling multiple effect stacks and copy-pasting settings clip by clip.
With Color Finale 2 applied to an adjustment layer stretched over the timeline, the editor drops a primary correction onto track one, then adds a second track with a gentle orange-teal split via the colour wheels. A third track holds an HSL Curves adjustment that pulls a little yellow out of a practical lamp that keeps creeping into the wide shot. Because the bus architecture lets a luma key from track two isolate just the midtones, the lamp fix on track three does not fight the split-tone layer above it. When the director asks for a version with a cooler background, swapping the split-tone track and saving the whole stack as a preset takes under a minute. The saved preset then loads onto the B-camera clips with a single drag, and the editor tweaks only the exposure offset per angle. The session stays inside Final Cut Pro; no round-trip to Resolve, no XML export gymnastics.
Switch the working colour space to match your wide-gamut timeline
A few defaults in Color Finale 2 reward an early visit to preferences. The first is the working colour space. The plugin defaults to Rec. 709, but if your project lives in a wide-gamut timeline — Rec. 2020 or P3 — switching this early prevents colour shifts that are hard to unpick later. The setting lives in the Color Finale application, not inside the Final Cut Pro effect panel, so it is easy to miss on a first install.
The scopes overlay behaviour is another candidate. By default, the waveform and vectorscope float in a separate window tied to the companion app. Tick the option to dock scopes inside the Final Cut Pro viewer, and they stay visible as you scrub the timeline. The refresh is fast enough on an Apple silicon Mac that there is little penalty for leaving them live.
Consider also setting a default preset folder. The plugin ships with thirty ASCEND presets, but the real workflow gain comes from pointing the preset browser at a project folder where you save looks as you build them. That way, the colourist on the next episode sees the same folder without hunting through the package contents of the plugin. Finally, check the LUT export resolution — it defaults to 33-point cubes. For a finishing LUT destined for an online suite, bumping this to 65-point costs little in compute and keeps smoother gradients in deep shadows.
Covers daily shot-matching but does not replace a dedicated grading app
Does it replace the need for a dedicated grading application? Not entirely. Color Finale 2 brings a track-and-bus model inside Final Cut Pro, which covers the majority of shot-matching and look-creation tasks an editor faces daily. But it does not include the noise reduction, grain management or multi-still gallery tools that a full grading suite offers. Think of it as extending Final Cut Pro’s colour capacity far enough that a round-trip becomes the exception, not the rule.
Will it slow down playback on an older Intel machine? The plugin is a 64-bit x86 build, so it runs natively on Intel Macs without Rosetta translation. On a machine from the 2016–2019 era, a single track of primary correction rarely drops frames at half-resolution playback. Layering four or five tracks with HSL Curves and masks can push an older i5 or i7, but the track bypass toggle makes it quick to isolate performance hits. Editors on Apple silicon report more headroom, even with heavier stacks.
What happens to projects if the plugin is removed later? The grade is baked into the Final Cut Pro effect stack as Color Finale parameters. If the plugin is uninstalled, those clips show a missing-effect warning and revert to the uncorrected image. Exporting a graded master before removing the plugin is the safe path. There is no automatic flatten-to-baked-clip function, so plan archiving accordingly.
Place it before or after a film grain overlay in the effect stack
Color Finale 2 works alongside other Final Cut Pro effects without much friction. The plugin sits in the effect stack like any other video effect, so you can place it before or after a third-party film grain overlay or a noise reduction filter from another developer. A common arrangement places noise reduction first, then Color Finale 2, then a grain plate or a broadcast-safe limiter last. The order matters less for LUT operations — the LUT Utility can load a technical transform LUT at the start of the chain, and Color Finale 2 handles the creative grade downstream.
The companion application is the unusual piece. It runs separately and handles preset management, LUT authoring and the scope window. On a single-screen MacBook, switching between the companion app and Final Cut Pro can feel like a small context break. On a two-screen setup, parking the app and its scopes on the second display makes the split feel more natural. The application also registers the plugin with macOS, which is why the initial launch requires a Gatekeeper bypass step via Terminal. Once that is done, the app stays out of the way.
For editors who already own a library of LUTs from other software, the LUT Utility reads standard .cube files without conversion. Presets and LUTs authored inside Color Finale 2 also export as .cube files, so they travel into Resolve or After Effects cleanly. That two-way LUT flow is what makes the plugin viable as a look-development tool even when the final conform happens elsewhere. A colourist can build a look inside Final Cut Pro during an offline edit, export the LUT, and hand it to the online suite without anyone needing to rebuild the grade from notes.