Aspecten
 Download (5 GB)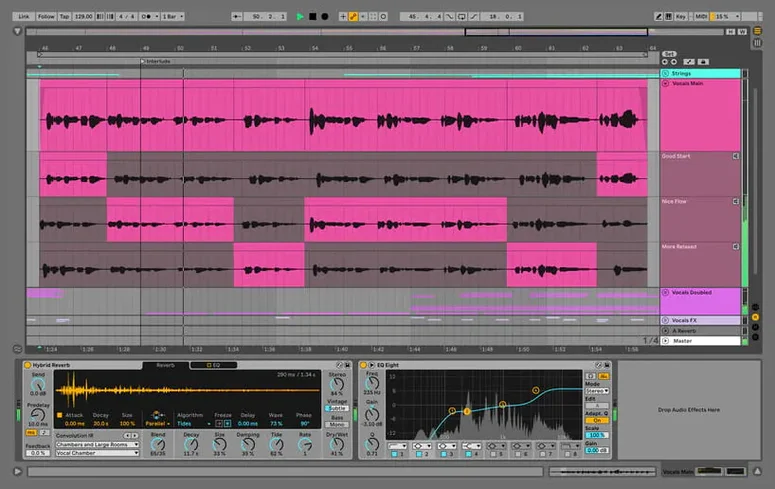
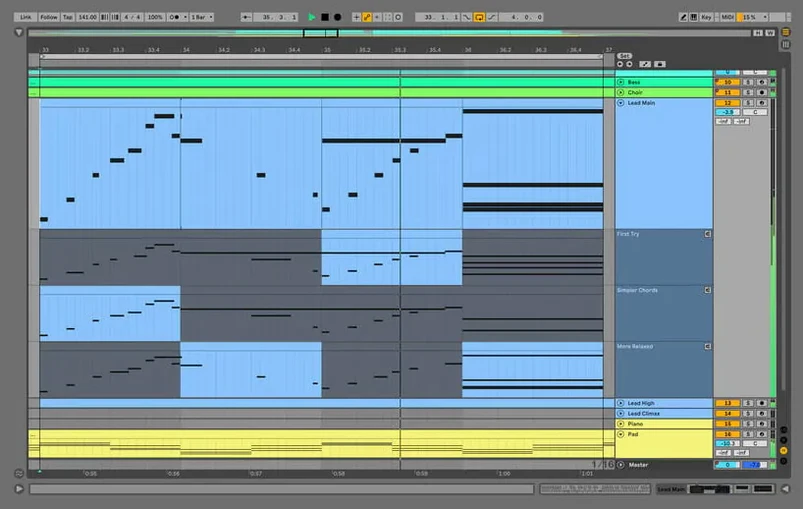
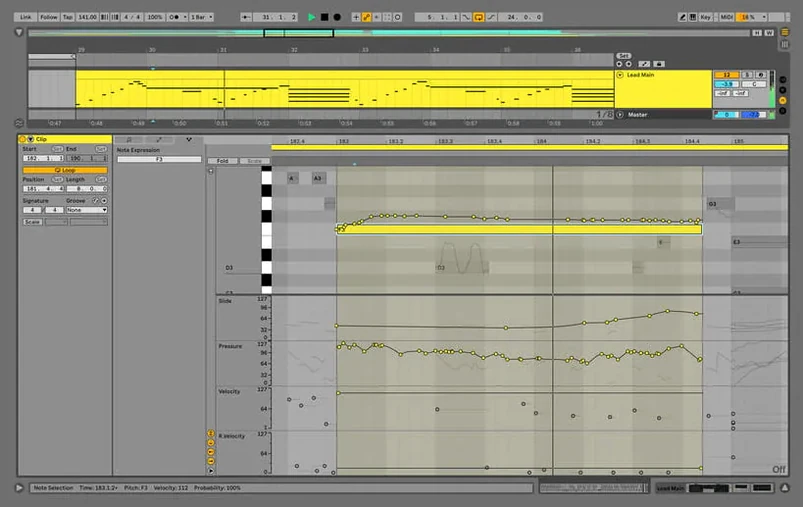
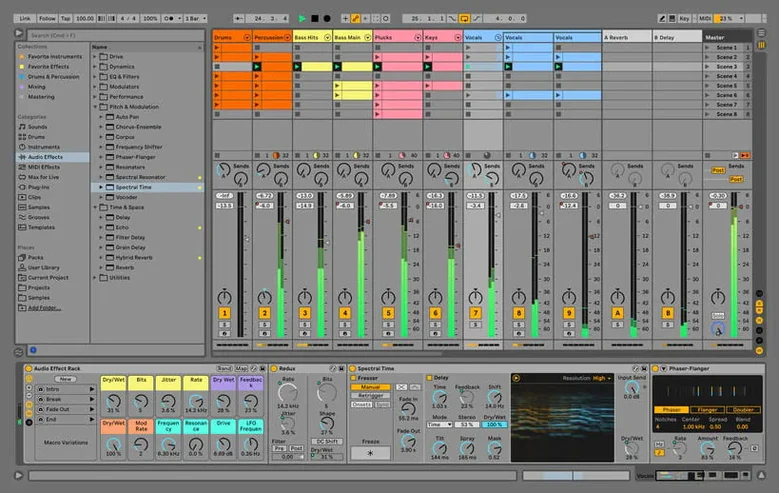
Anyone who has used a linear DAW understands the friction of stopping playback to audition a sound or try a different drum pattern. Ableton Live 12 Suite takes a different path. Its Session View treats clips as interchangeable blocks, letting you trigger, swap, and reshape ideas while the transport keeps running — a design that feels less like a recording desk and more like an instrument.
Instruments and sounds
The Suite edition bundles a broad collection of instruments, kits, loops, and curated sounds. Rather than treating these as mere add-ons, Live integrates them into its browser with tagging and preview that works in time with the project. A new synthesizer preset or a drum rack can be dragged in mid-playback without a glitch, so the line between sound design and arrangement stays permeable.
Real-time synchronization
When multiple devices or applications need to stay locked together, Live synchronizes content and works in real time. Link keeps tempo aligned across instances and compatible software, while MIDI clock and timecode handle hardware. The practical upshot is that a change made on a controller or a second machine registers without nudging the session out of time — a quiet but essential detail when a track is already moving.
Press 0 on an empty clip to mute the whole track
A handful of Live 12's most practical touches sit just outside the obvious toolbars. Pressing 0 on an empty clip slot in Session View deactivates all currently playing clips on that track — a single-key mute lane that saves routing through a mixer channel. In Arrangement View, Cmd-Option-F summons the Follow action panel, which nudges playback to chase the edit cursor as you move through time. Neither shortcut is labelled on screen.
The Clip Detail view holds its own quiet time-savers. Right-clicking a warp marker reveals a contextual menu where Warp As lets you reinterpret a clip's tempo without opening the full Quantize dialogue. Dragging a sample from the browser directly onto a Drum Rack pad auto-maps it to that pad and creates a Simpler instrument in one motion; holding Option during the drag swaps the existing pad assignment instead of layering it.
For users who work across two monitors, pressing F12 hides the Detail View entirely and expands the Clip or Device area to fill the second screen. The Mixer panel can be collapsed per-track with Cmd-Option-I, which declutters a large session without removing channels from the signal path. In the Browser, typing a minus sign before a search term excludes results containing that word — typing -808 filters out every Classic 808 sample while leaving the rest of the drum library in view.
A workflow for vocal comping
Comping a lead vocal in Live 12 follows a tidy sequence that leans on Take Lanes and the new comping tools added in version 12. The steps below assume a multi-take recording session already captured in Arrangement View, with the raw takes sitting in individual lanes beneath the main track.
- Unfold the take lanes. Click the small triangle on the track header to reveal all recorded passes. Each take appears in its own lane, colour-matched to the parent track but shaded lighter for quick visual separation.
- Loop a short phrase. Select a two- or four-bar region in the Arrangement and activate the Loop switch. This isolates a single line or verse without losing the context of the surrounding arrangement.
- Audition takes with the comp tool. Hover the mouse over any take lane and the cursor changes to a crosshair. Click-drag across a section of a take to promote that slice to the main comp lane. The promoted segment highlights, and playback immediately reflects the change.
- Refine the edit boundaries. Comp slice edges default to bar lines, but holding
Cmdwhile dragging a boundary lets you slip it to transient points or sample-level offsets. This is especially helpful when a breath or consonant falls just ahead of the downbeat. - Crossfade between comp slices. Live 12 auto-applies a short fade at each slice junction. Drag the fade handle on the main lane to lengthen or shorten it. A value around 8–12 ms usually masks the seam without blurring the attack.
- Flatten or commit. Once the composite take sounds coherent, right-click the track header and choose Flatten to render the comp into a single clip. The original take lanes are removed from view but remain in the project folder, so nothing is lost.
This workflow handles a full lead vocal in under ten minutes once the shortcuts become muscle memory. The key advantage over traditional playlisting is that comp slices remain non-destructive until you choose to flatten — you can revisit and reselect takes from any lane at any point during the mix.
One performer, one laptop, eight songs in Session View
Consider a live performer who builds backing tracks at home on an M1 MacBook Air and then performs with the same machine on stage. She uses Live 12 Suite to prepare a set of eight songs, each stored as a separate scene group in Session View. During soundcheck, the venue's PA introduces a low-end bump that makes her kick drum samples boom at 90 Hz. She opens the EQ Eight device on the kick chain, switches the display to Spectrum mode, and spots the resonance immediately. She enables the adaptive Q setting so the cut narrows as she deepens the gain reduction — a small feature that prevents the filter from eating into the sub frequencies she wants to keep.
The whole adjustment takes under a minute and happens without stopping playback. She saves the EQ Eight device as a rack preset, then drags it onto the kick chain in the other seven scenes. During the show, she switches between songs by launching scene rows from a Push controller, and the refined kick sound carries across every transition. The MacBook Air stays cool to the touch after a two-hour set, and CPU meter hovers around 42% even with six return tracks and a convolution reverb loaded. This kind of reliability, combined with the ability to tweak processing on the fly, makes a laptop feel like a self-contained performance rig.
Turn off ‘Select on Launch’ and other preference tweaks
Out of the box, Live 12's preferences are conservative. A few changes make an immediate difference to everyday use. The options below live under Live > Settings on macOS and apply globally across all projects.
- Record Warp Launch. Head to the Record/Warp/Launch tab and set Loop/Warp Short Samples to Unwarped One-Shot. This stops Live from time-stretching short percussion hits and foley clips dragged in from the browser, preserving their transient snap.
- Auto-Warp Long Samples. Toggle this off if you often import stems or full tracks with known tempos. Leaving it on is useful for unknown material, but it occasionally misreads tempo and stretches a 120 bpm file to 119.87 — a tiny drift that compounds over a full arrangement.
- Default SR & Pitch Conversion. Set Default SR Conversion to High Quality. The standard setting saves a negligible amount of CPU, while High Quality avoids audible aliasing when pitch-shifting samples more than a few semitones.
- Plug-in sources. Under the Plug-ins tab, make sure both Use Audio Units and Use VST2 are active. Live 12 still supports VST2 alongside VST3 and AU, and many older instruments and effects rely on it. Rescanning after a fresh install populates the browser correctly.
- Look and Feel. Switch the Zoom Display setting to Auto if you connect an external monitor regularly. It adjusts Live's interface scaling when you plug in a different display, avoiding the tiny-text problem on high-DPI screens.
- File Folder. Set a dedicated Max Application folder if you use Max for Live devices heavily. Keeping Max content in a single location speeds up device loading and prevents missing-dependency errors when moving projects between machines.
40 tracks, two dozen plug-ins, loaded in nine seconds
On a modern Apple Silicon Mac, Live 12.4.6 launches in under four seconds and loads a medium-sized Set with 40 tracks and two dozen plug-ins in about nine seconds. The application responds to transport commands with virtually no lag, and dragging a complex instrument rack into a running session does not interrupt audio. This snappiness carries through to browsing: the sound library previews load instantly because Live streams them from disk rather than loading entire sample files into RAM before auditioning.
Memory use is disciplined. An empty Set sits at roughly 380 MB of RAM. A moderately dense production — say, 30 audio tracks, 15 MIDI tracks, ten stock devices and eight third-party plug-ins — pushes that figure to around 2.1 GB, leaving ample headroom on machines with 16 GB unified memory and above. The application idles near 2–3% CPU when playback is stopped and hovers between 18–35% during dense passages, depending on the plug-in load and the sample rate.
Stability has tightened with the 12.4.6 update, which specifically addressed a hang during rendering, bouncing, and consolidating in Sets with many audio clips using Beats Warp Mode and Transients Granular Resolution. In practice, that means large stem-export jobs that previously risked a spinning beachball now complete without incident. The fix is narrow in scope but significant for anyone who regularly bounces multitrack arrangements or consolidates heavily warped material for archiving.
Live's disk-streaming engine deserves a mention. When a project references samples spread across an external SSD, playback of 80-plus audio tracks stays smooth at a 128-sample buffer. The application reads ahead aggressively but does not pin the disk at 100% utilisation; Activity Monitor shows read speeds levelling off around 60–70 MB/s on a typical SATA SSD, which leaves throughput for other applications. This measured I/O behaviour means a large recording session can run alongside a web browser and a notes app without a single audio dropout, even on a MacBook Air with passive cooling.